How to Add the Rainbow Filter Overlay on an Image?
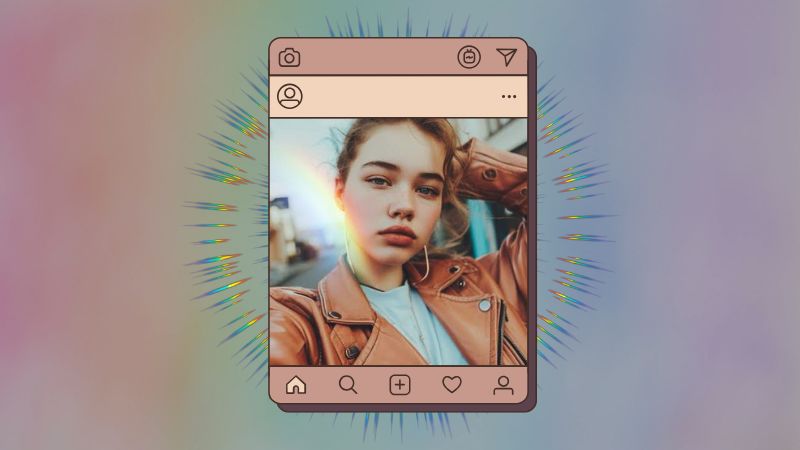
You know how on a bright sunny day there’s this ray of rainbow coming through the window and it looks ever so beautiful! Truly makes you appreciate nature no matter where you are! This phenomenon is a beautiful moment to witness which becomes a 1000 folds better if you are able to perceive this rainbow effect in your picture. But not all of us are this lucky and so rainbow filters across many apps can help you achieve this effect in your photos where you have the freedom to place the overlay wherever you like.
How to Add Rainbow Filter to Photo with BeautyPlus
BeautyPlus is truly one of the best photo editors out there and this claim is backed by the immense ease of use you will get to experience on its application, added to the professional results you will get to experience first-hand.
You can practically use all the tools for free whereas in the case of even the most advanced tools you get a preview beforehand, so you know exactly what to expect from the many of these tools. And when it comes down to adding a rainbow filter it is one of the easiest photo editing functions you can do, so here’s how you can add rainbow filter to photo effortlessly.
1. Open the BeautyPlus app on your device, be it an Android device or iOS, it works across both. Download it if you haven’t already.
2. On the homepage of BeautyPlus, you will find the “Start Editing” button, tap it.
3. It will prompt you to open a picture from your gallery; so all you have to do is browse through your photos and tap on the photo to which you want to add the filter.
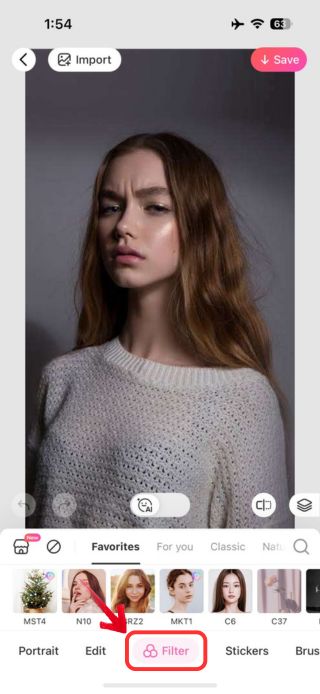
4. As your image opens on the edit screen, tap on the “Filter” tab at the bottom.

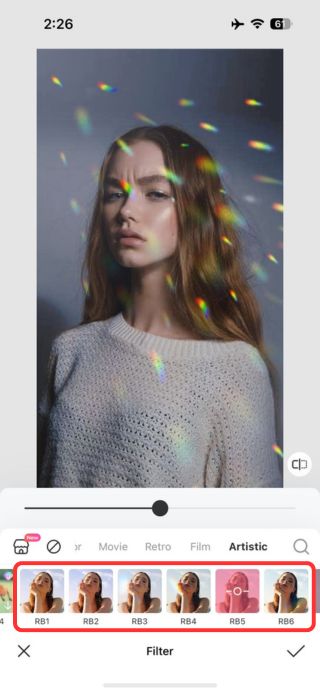
5. Scroll through the filter category and tap on the “Artistic” category to use the BeautyPlus Rainbow filters.

6. The rainbow filters are named “RB1”, “RB2”, “RB3”, “RB4”, “RB5”, and “RB6”, tap on each to see which fits perfectly with your aesthetic.
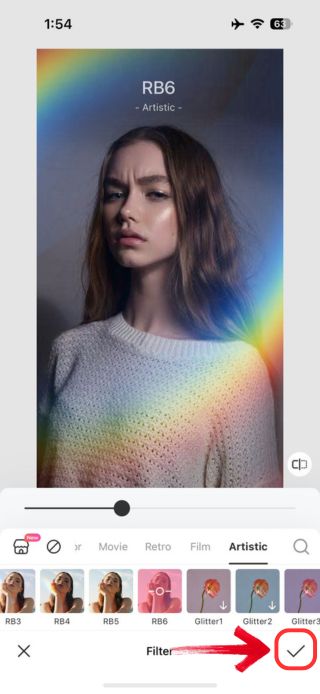
7. Once finalized with the results, tap on the “Tick” icon at the bottom right.
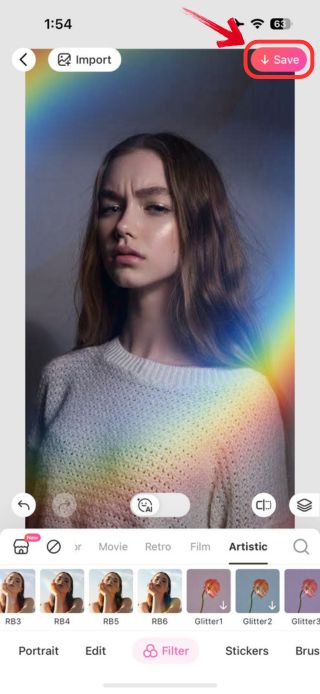
8. Next to save the image to your device, tap “Save” at the top right of the screen.
How to Add A Rainbow Overlay to the Photo Manually?
The preset filters don’t always make the cut and for that and to get the complete experience out of the rainbow effect, BeautyPlus allows you to use the overlay feature with which you can select a rainbow picture of your choice to overlay onto your photo.
This way you are not limited to only a certain few filters and allow yourself to choose from the different rainbow options available and can easily add rainbow effect to photo but with stickers!
1. Open the BeautyPlus app on your device; it is easy to download and free to use for the most part!
2. As you open BeautyPlus you will notice a big button saying “Start Editing” at the center of the homepage, tap it.

3. You will be prompted to choose an image from your gallery; tap the photo on which you want to add the rainbow overlay effect.
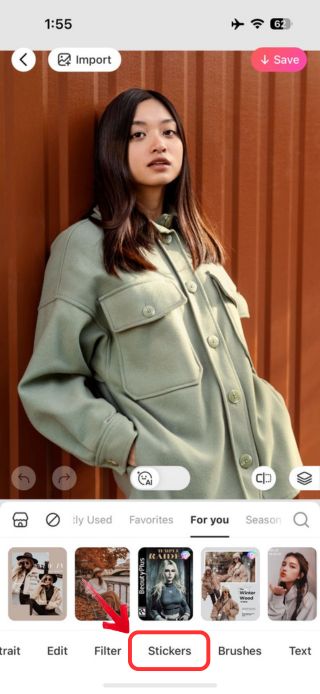
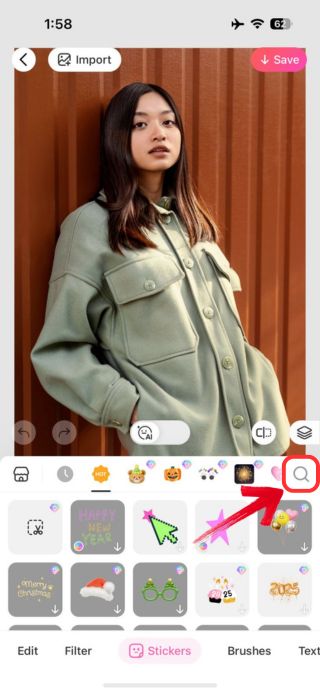
4. Next, as your image will appear on the edit screen you will want to scroll and look for the “Stickers” tab below. Once you find it, click on it to view the BeautyPlus stickers collections.
5. Now tap on the “Magnifying Glass” icon. This indicates the search option, tap it to open the search menu and type “Rainbow”.
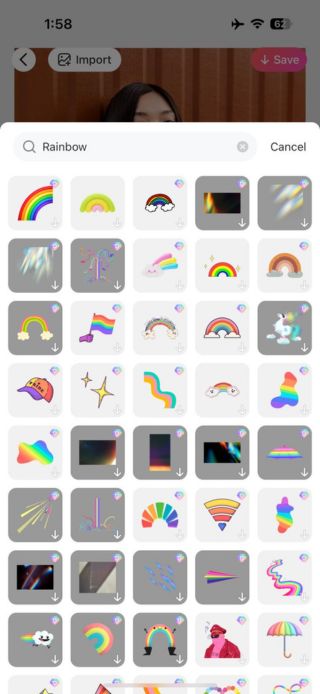
6. Plenty of rainbow stickers will appear. Choose one that you feel will best suit your image by taping it.
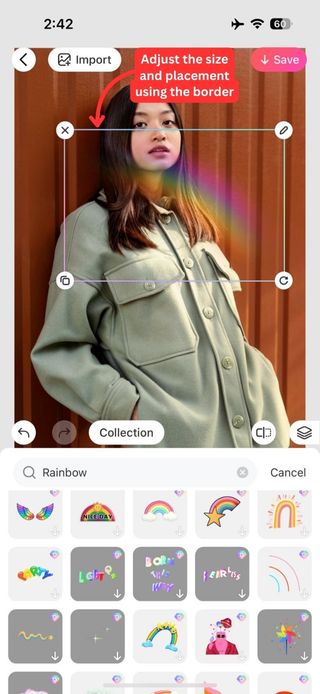
7. Adjust the size and placement of the overlay sticker to fit the image and it is exactly where you need it to be.
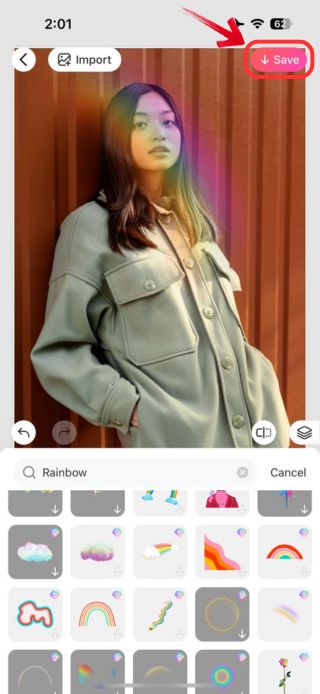
8. Now once you’re satisfied with the results, simply tap the “Save” button found at the top-right corner, to save your edited image.
Conclusion
If you have a portrait, still life, landscape or any other kind of image that you feel like could use a little bit more color, choosing BeautyPlus would be a smart choice! It is pretty well established at this point that when BeautyPlus applies a filter to a photo it does it so flawlessly attributing to its smart analysis and applications.
You will not be disappointed with the results and although the rainbow filter option only gives around 6 options to choose from, you can effectively use the stickers to add more depth to your photo with the help of more rainbow gradient hues.


