
How to Rotate a Picture on iPhone, iPad, and Mac
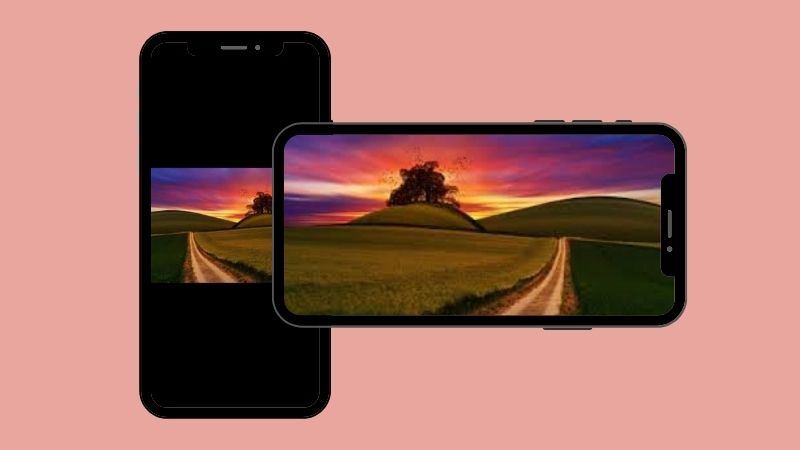
It’s a pretty common occurrence when you are about to take pictures in portrait mode, but it turns out the phone was a little tilted and now your favorite picture is in landscape mode, with the extra black space converting the borders. It may completely throw off the aesthetic that you are going for, and the opportunity to take that same picture may never come. The great news is you can convert your photo from portrait to landscape mode (or vice versa) without compromising on the quality of the image by finding out how to rotate a picture on iPhone and iPad.
How to Rotate a Picture on iPhone & iPad
If you have ever taken a photo on your iPhone or iPad, you would know that it usually automatically adjusts the picture’s orientation on its own as you rotate the phone. When you rotate the phone and hold it horizontally, the phone clicks the pictures in landscape mode, while when you hold it vertically it takes the picture in portrait mode.
You can obviously set and turn this particular setting off and manually change the orientation. And for when you have already taken the picture there is a really easy way to change its orientation and here’s how to rotate a picture on iPhone 13 or any other iPhone updated to iOS 17:
1. Open your photos app on your iPhone or iPad, wherever you have the photo of which orientation you want to change and tap on the photo to open it.
2. At the top right, find the “Edit” tab and tap it.

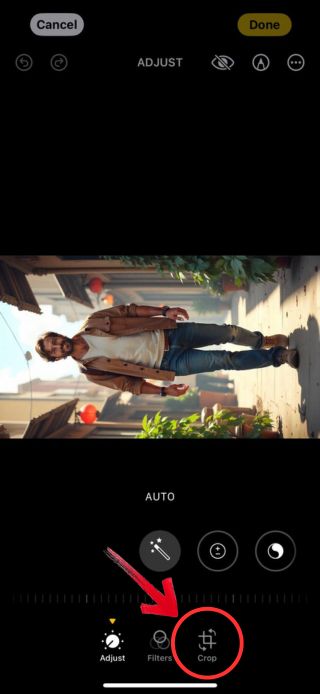
3. At the bottom, you will find three options, the last one among them is “Crop”. Tap it.
4. At the top left, you will notice two icons; clockwise, and anit-clockwise. The first one is reversing the image, and the other rotating the image. Tap on rotate and the picture will do a 90° turn each time you tap it.
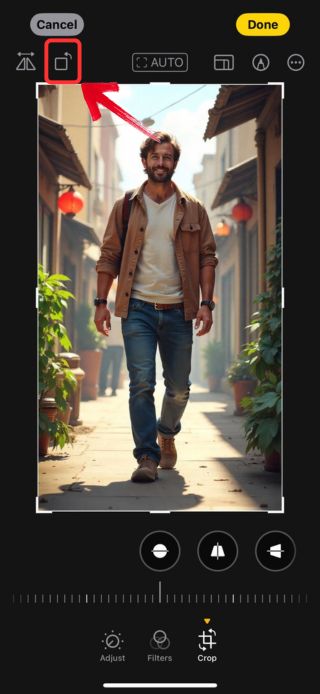
5. Once you have achieved your desired orientation, tap on “Done” at the top right and it will automatically save to your gallery.

How to Rotate a Picture on Mac
If you own a Macbook, you essentially have it all because with a Macbook you have all the access to tools and features you normally would at an iPhone or iPad. Now, if you have learned how to rotate a picture on iPhone 15 or any other iPhone, rotating a photo on the Preview app is an even sweeter slice of cake. Find out how to rotate a picture on Mac with these steps:
1. Go to your preview app, by either clicking on it or tapping the screen, if you have a touch screen.
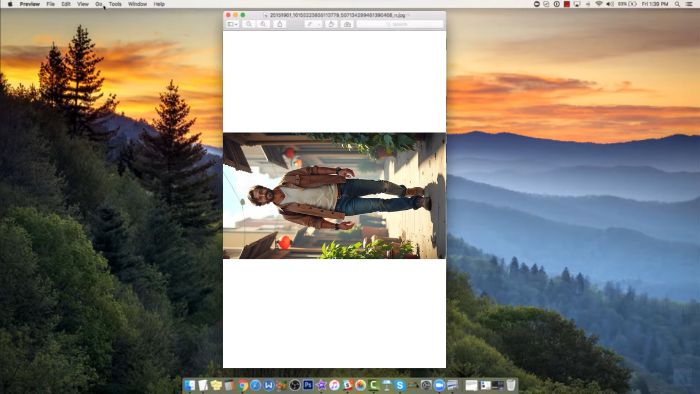
2. Choose and open the image in the preview app you want to rotate.
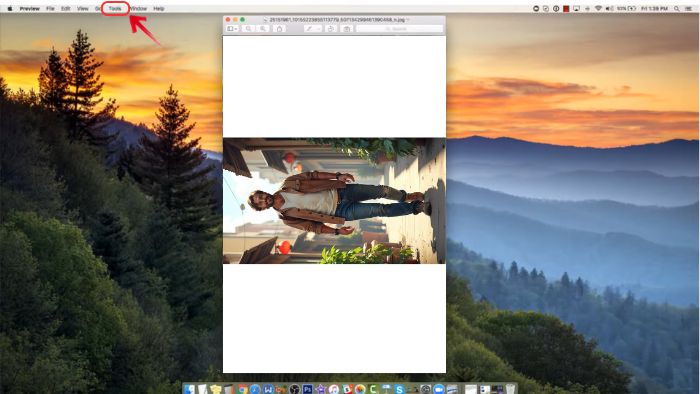
3. Next at the toolbar, you see the “Tools” button, click on it and then select the “Rotate” options from the drop-down. Both the “Rotate Left” or “Rotate Right” options work perfectly fine.
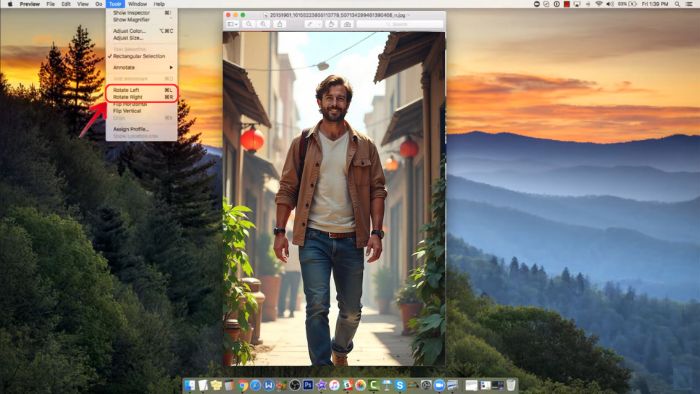
4. You may tap the “Rotate” buttons repeatedly to achieve your desired results, and Mac will automatically save the rotated images to your device too.
How to Rotate a Picture with BeautyPlus (Both Android And iPhone)
Now, if navigating through the editing features on iPhone or your Android is something you do not want to get your hands dirty with, you may as will stick to your trusty third-party photo editing tool; BeautyPlus. Along with multiple beauty enhancing and AI photo editing tools, it can conveniently help you fix the orientation of your photos too. And to fix that, BeautyPlus is equipped with plenty of tools, including the rotation tool. Here’s how to slightly rotate a picture on iPhone or Android with the help of BeautyPlus.
1. Open the BeautyPlus app on your device by tapping on the icon on your screen.
2. Find the “Start Editing” button on the homepage and tap it.

3. You will be prompted to choose an image from your phone;s gallery. Once you have selected it will open on the photo editing screen.
4. At the bottom of the screen locate the “Edit” tab and tap it.
5. As you are presented with more editing options, tap on the first editing feature that says “Crop”.

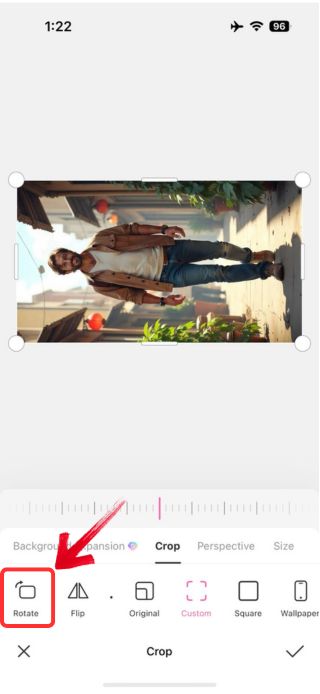
6. The first option to appear will be “Rotate”. Tap it to rotate the picture at a 90° angle. Keep tapping to change the orientation.
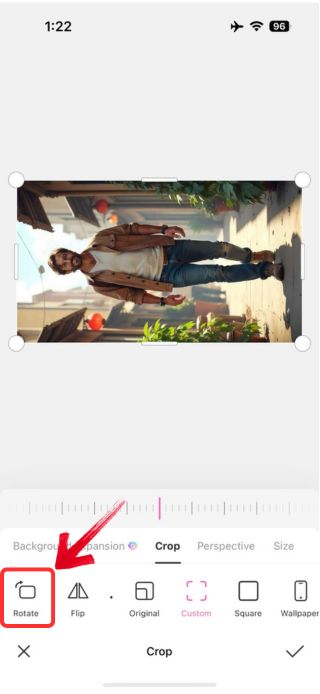
7. Once satisfied, tap “✔” at the bottom right of the photo editing page.

8. At the top right, tap “Save” to save the photo to your device.
Bottomline
Rotating a picture is actually pretty easy and you have more than just a single avenue to change it. So the next time you take a picture and it doesn’t come out to be in the dimensions you wanted it to be in, don’t be bumped. There’s always a way to fix or more. And with BeautyPlus you will not only get to rotate your picture easily but allow you to work with the dimensions of your choice at your complete free will.


