7 Best Headshot Backgrounds to Create Impactful Photos
You know how there’s a thing called a passport photo and it’s supposed to have this solid color background in a very specific lighting? It is simply a standard set by authorities that we must abide by when getting our photos taken for our passports. And just like that there are plenty of occasions where you will be required to get a headshot ready with a very specific headshot background depending on what you need the photo for. Now you don’t need to go to a studio to fulfill the whole purpose of getting a headshot, you can do it in the comfort of your home.
Why Backgrounds Matter?
A background is really the filler area of the image of your headshot, and while the purpose of the headshot remains to bring focus to the object of the photo, which in most cases is the person of whose the headshot is being taken, the background plays a very critical role.
You can call it a day and make the background as it is a good enough background choice to bring all the attending to the headshot, but there are other critical factors into play as well and that’s why the background matters and backgrounds come in more than just one or two options to choose from.
- It sets the tone for the image. If you are getting a headshot for something serious, you would want to go for a solid plain and bright background.
- You don’t want the background to be crowded with other objects which defeats the whole purpose of the headshot which is to bring focus to the subject.
- You could go for a solid background, but each color can bring out the skin tone in a different light, so something that brings the natural glowy appearance could work as a good background.
- It can be used to provide context to either your professional or identity, so for example, if you are a tech professional a sleek background with superficial code as a background would do the trick.
Top 7 Background Options for Headshots in 2025
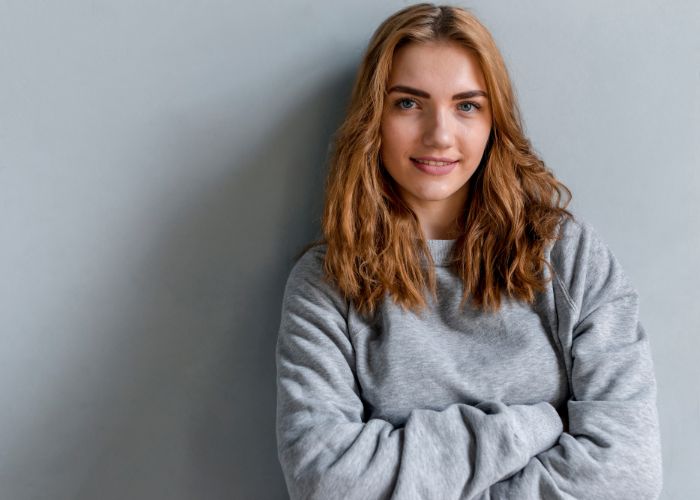
1. Studio Headshot Background
A studio headshot background is usually neutral solid colors like white, grey and black, and the reason why they call it the studio high resolution headshot background is that it is often found in professional studios. This professional headshot background preference is usually a choice for professional environments.
2. Nature Environment Background
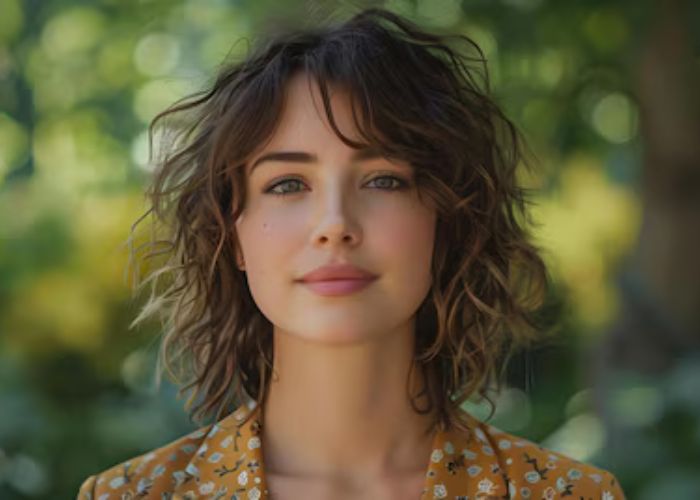
Outdoor natural settings where the green trees and the blue skies are in full display behind a headshot are often a great backdrop choice for many people as these settings evoke a sense of warmth, relaxation, and trust.
3. Industrial and Corporate Background
This is a pretty vast area of background themes which cover all types of colors, textures, and environments. This could either be those red bricks that give that constructive industrial and rugged look, or you could go for that sleek and modern aesthetic.

4. Office Environment Background
Offices are not just those brightly lit cubicles. When we speak of the headshot background office environment, we think it is a little more diverse in terms of office environments. This includes bookshelves, massive conference rooms, desks, and essentially work-focused environments.

5. Background With Art
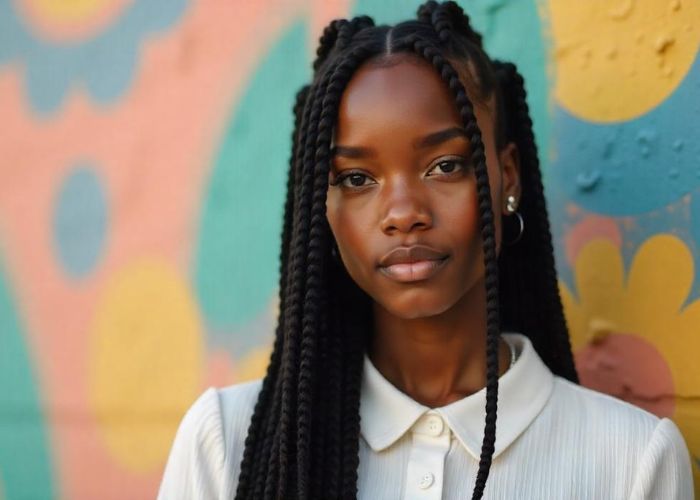
A little artsy flair to the background that brings focus to the headshot while simultaneously adding personality and creativity is a fairly good deal. Artistic backgrounds can range from abstract designs to murals or subtle patterns, which gives it that eye-catching yet professional vibe. They are usually something creative professionals like artists, designers, or marketers use in their headshots to create a bold statement or have a background space that vocalizes their creativity.
6. Textured Background
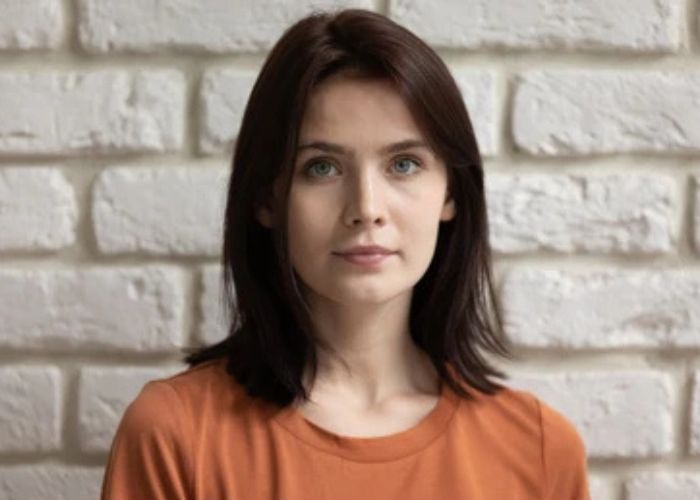
Backgrounds that have a little texture going on, so something like a rustic brick wall, a wooden panel, or a stucco finish, can help add depth and dimension to your headshot. Their use case is just as versatile as the option for a textured background that you have since they can be used for both a professional setting or for something more informal
7. Blurred Background
A blurred background is usually achieved through a shallow depth of field and that is a timeless classic for headshots. They are usually especially popular for corporate or LinkedIn headshot backgrounds, where simplicity and elegance are key.
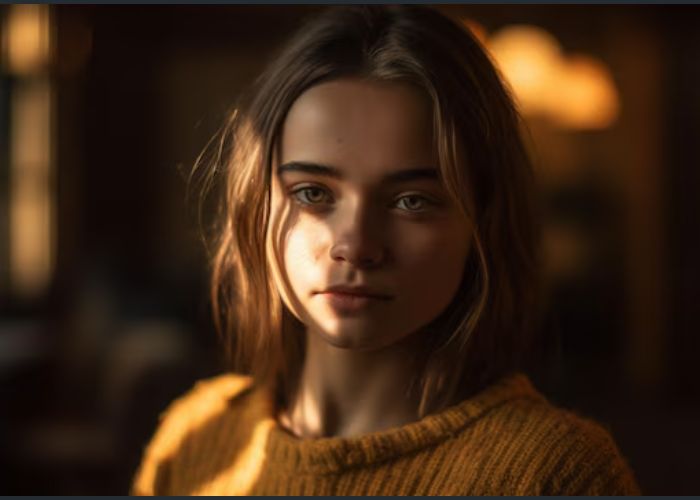
Create the Perfect Headshot Background for Your Photo
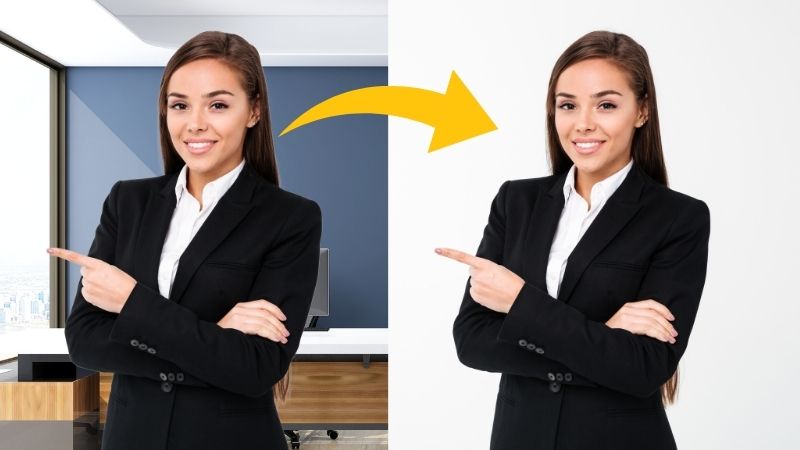
What if there was a way to get your perfect headshot isolated from that one picture you hold very dear and turn that into a headshot photo by changing the background? Turns out there is a very efficient and easy way to do that all thanks to BeautyPlus. And no, you don’t need to learn those complex editing features to be able to achieve that.
The fact that BeautyPlus utilizes AI to help you achieve the perfect high-resolution headshot background makes the experience even better! There are two ways you can go about it, and you have complete freedom to choose between the two. One is through your phone on the BeautyPlus application and the other on your browser. Since preferences like these are individualistic, you can find your comfort in either!
BeautyPlus App
1. Open the BeautyPlus app on your device which you can do by simply tapping on the BeautyPlus icon after installing it to your device.
2. At the homepage of the BeautyPlus app, you will see multiple options above the “Start Editing” button. Look for the “Remove Bg” option and tap it.
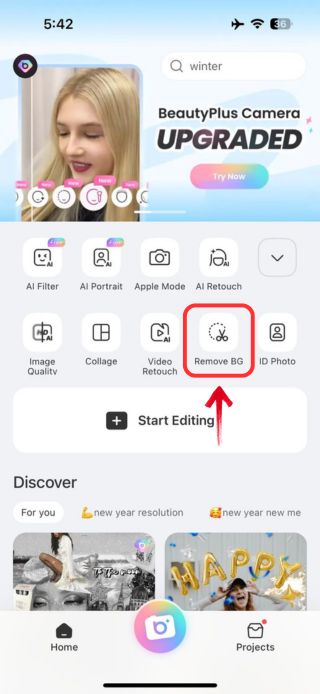
3. The next thing you will see will be your gallery photos, from which you have to select your photo. Simply tap on the photo you want to edit and it will appear on the edit screen.
4. The prime object of the photo, which is the headshot will seamlessly be highlighted implying that the remaining background will be removed.
5. If you want more area to be either covered or removed simply either tap on the brush tool or eraser tool to make your edits.
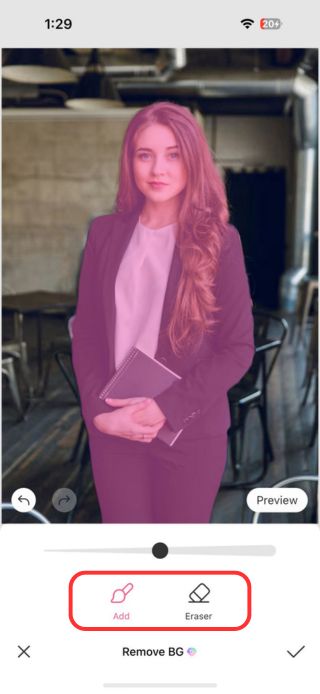
6. Once you are satisfied with how the image turned out, simply tap on the “✔” icon.
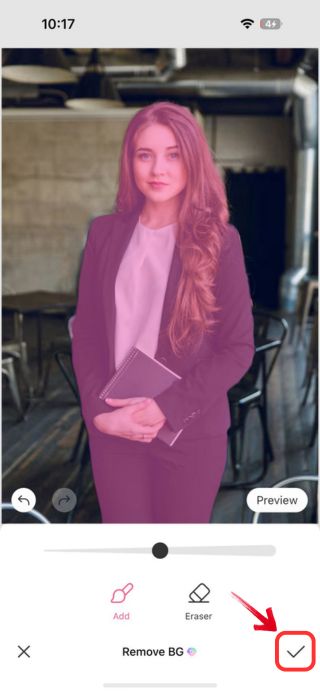
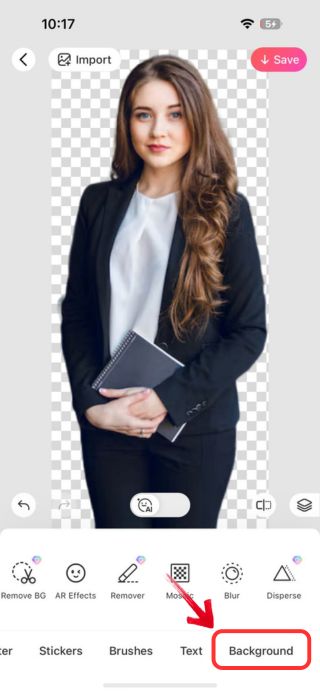
7. Next, you will notice the background is gone, but you need to fill it up. You can do that by scrolling past the edit options at the bottom until you reach the “Background”, which is the last option. Tap it.
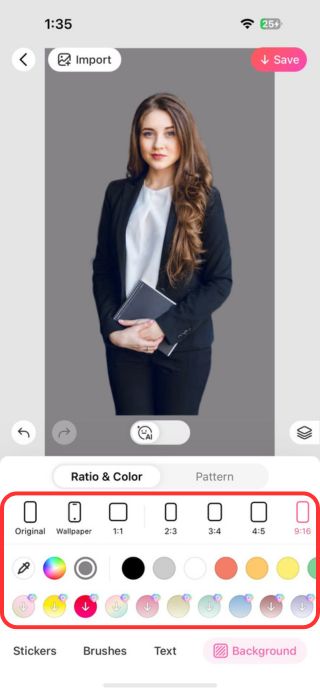
8. At the top, you can select the ratio you want for the picture and then tap on any of the colors below to fill the background with a solid color.
9. You can switch from “Ration & Colour” to “Pattern” by tapping on the “Pattern” option at the top of the ratios.
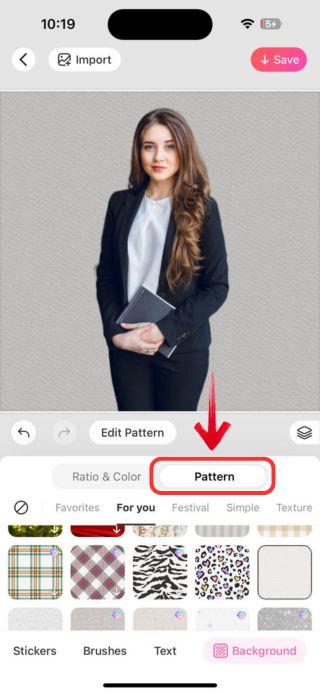
10. Switch between the different Pattern options and tap on any of the options that you like so the background fills with the same pattern.
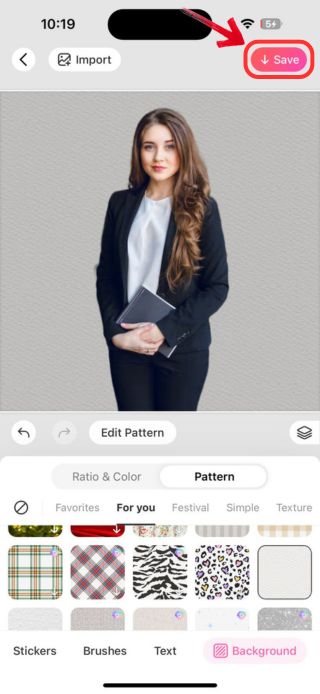
12. And when you are finally satisfied with how the image turned out, simply tap on “Save” at the top right of the screen to save the image to your device.
BeautyPlus Online photo editor
1. Open any browser of your choice and the first thing you would want to do is head to the BeautyPlus Background Remover tool.
2. At the BeautyPlus Background Remover page you will find an option for “Upload Photo”, click it.
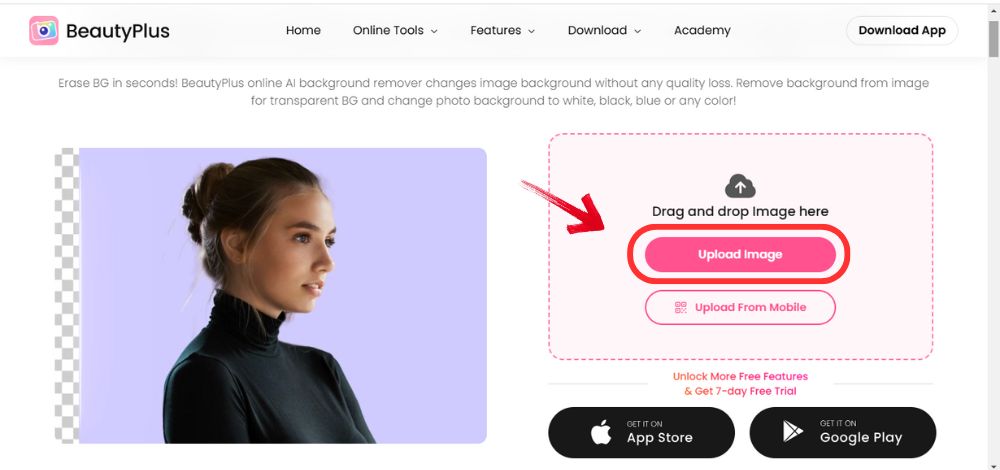
3. It will open files from where you can click on the photo you want to edit and click “Open”, to open it on the edit screen.
4. The background of the image will automatically be removed, and the side you will be provided with will have two options; “Modify Selection” and “Add Background”. Since you would want to fill in the Background click “Add Background”.
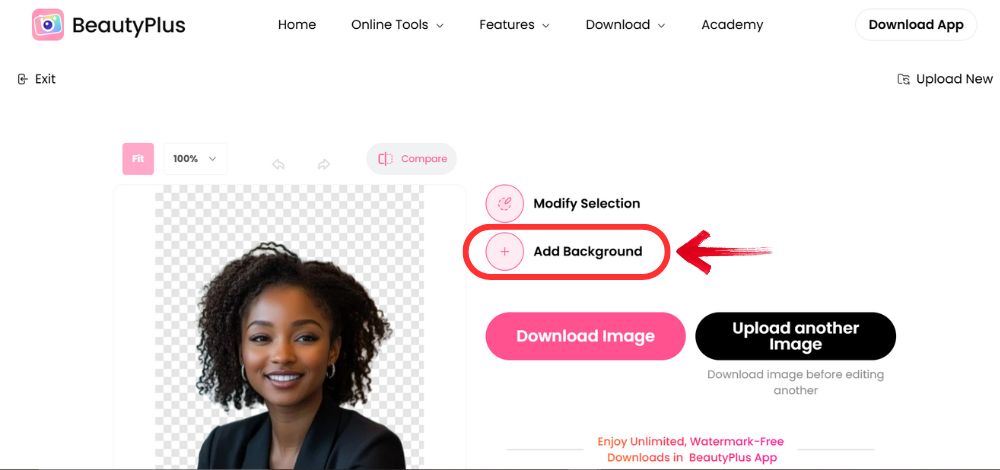
5. You will be provided to choose any of the solid colors from the options below colors. Click on any color to apply to your background.
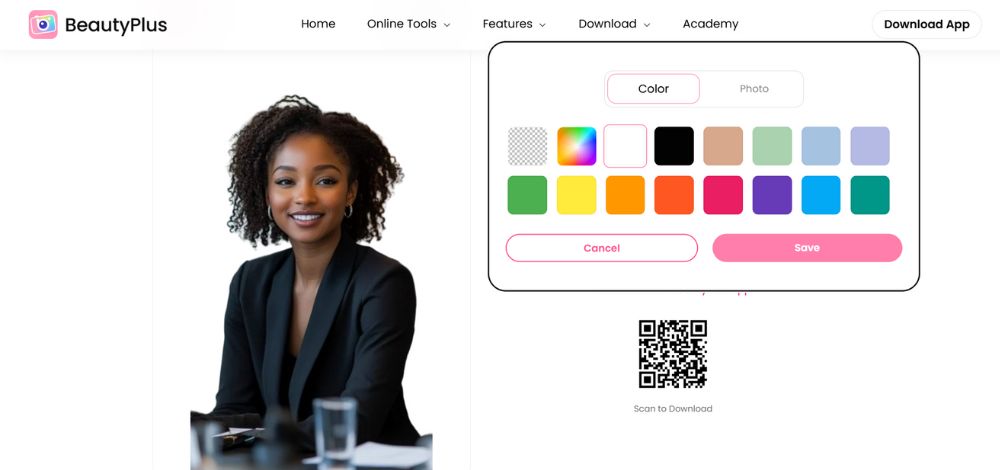
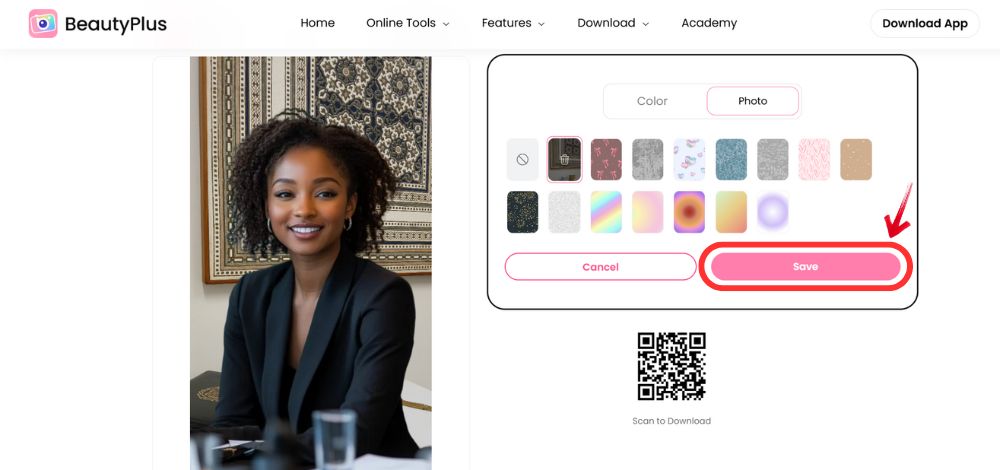
6. You can add a background of your choice as well, by switching from “Color” to “Photo”, and from there click on “Upload”.
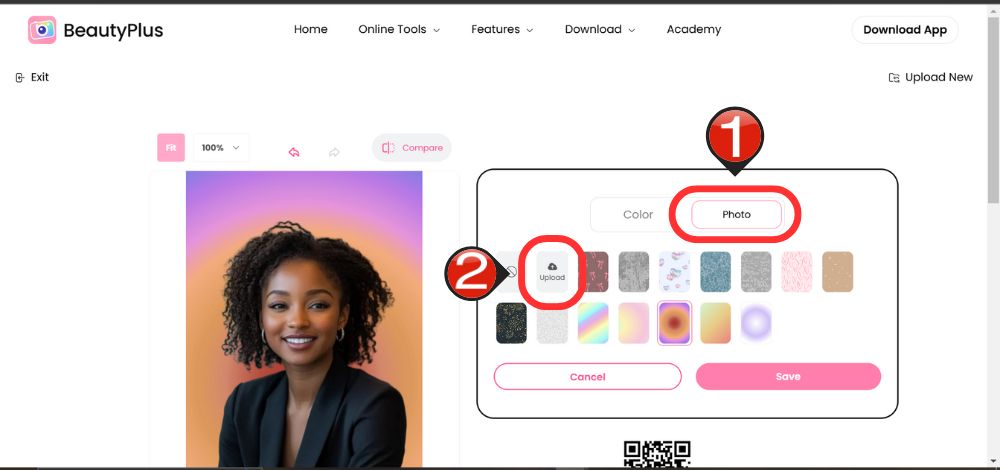
7. You will again be prompted to choose an image from files which you can open by double-clicking on the image.
8. Once satisfied with how your image turned out, click “Save” at the bottom to save the image to your device, ready to be shared.
Conclusion
Studio pictures are not just an inconvenience to get but they can sometimes be pricey, especially when you can’t settle on a single photo and need many retakes to get the perfect shot. Tools like BeautyPlus let you have full control over your photos where you get to decide everything as long as you filling the criteria for your headshot background, which BeautyPlus also makes sure to get right for you with plenty of background options.
And if you want a little something more customized you always have the option of importing your own background to import it as your headshot backdrop.


