How to Make Blurry Pictures Clear?
Photos can often get blurry no matter how stable our hand seems. If you clicked a superb photo but it got blurry somehow, you might want to sharpen it. Whether you’ve got an iPhone or an Android phone, we’ve got some exciting ways through which you can sharpen your photos without investing money in expensive tools and software.
In this article, we’re going to walk you through how to make blurry pictures clear on your iPhone, Android, or Windows PC. Remember that either device you choose, there are more multiple ways to get the work done.
4 Effortless Ways to Clear Your Blurry Photos
1. How to Make Blurry Pictures Clear on iPhone
So if you want to make blurry pictures clear on your iPhone, you can follow a very simple strategy that uses in-built features of your iPhone and doesn’t require internet connection or anything.
Unblurring Photos On iPhone With In-built Settings
- First, on your iPhone, open the Photos app.
- Now navigate the photo that you want to sharpen.
- Click on the photo and it’ll show its preview.
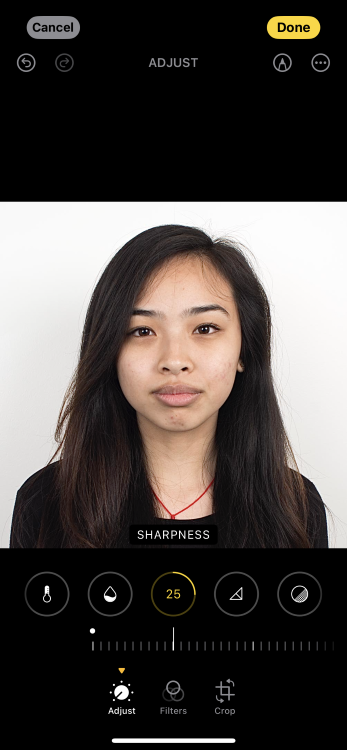
- On the top-right corner, click Edit.
- An Adjust window will open up. You can see your photo and some tools at the bottom.
- Scroll right on the tools below and find “Sharpeness”.
- Click on “Sharpeness” and you’ll see a slider adjustment tool.
- Swipe the slider as you desire to sharpen your picture. Keep sliding until you’re happy with the image’s sharpness.
- Once you’re done, tap Done. But if you’re not happy with the results or you want to revert, simply tap Cancel.
The adjusted photo will get saved on your iPhone immediately. Now, this tutorial above used an in-built feature in your iPhone but if you want a more professional and appealing result, you might have to use third-party tools like Adobe Lightroom. First, install this free tool on your iPhone from the App Store and then follow these steps.
Unblurring Photos On iPhone With Adobe Lightroom

- Follow the on-screen steps and log in with your Apple ID or Gmail account to get started.
- If it asks for your permission to access multimedia on your iPhone, allow access.
- Now you’ll see a list of photo thumbnails. Tap on the image that you want to unblur and then tap Done.
- Tap Effects tab at the bottom and you’ll see a few sliders like Texture, Clarity, and Dehaze. We’ll work on Clarity.
- Slide the Clarity slider and increase it accordingly.
- Then click on the Detail tab below and you’ll see a Sharpening sider. Adjust the slider accordingly.
- Return to the Effects tab and try Dehaze to unblur the subject’s background in your image.
- Now tap on the Blur tab and adjust the slider accordingly.
- Once you’re done with all the tools and happy with the image, simply tap on the tick mark on the bottom right. That’s it.
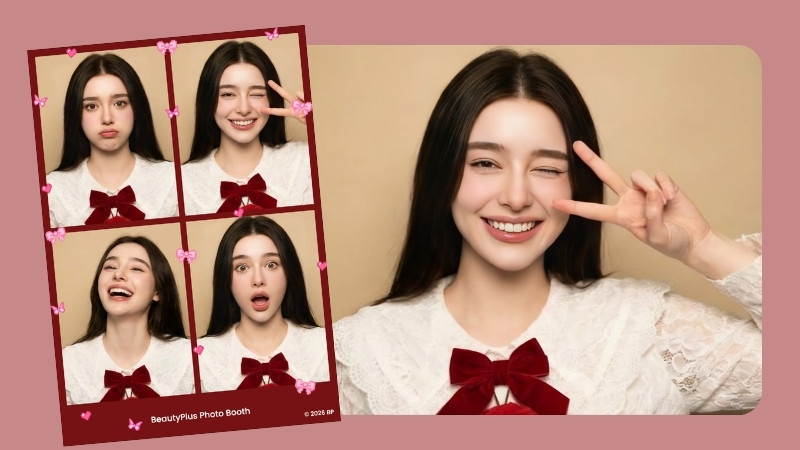
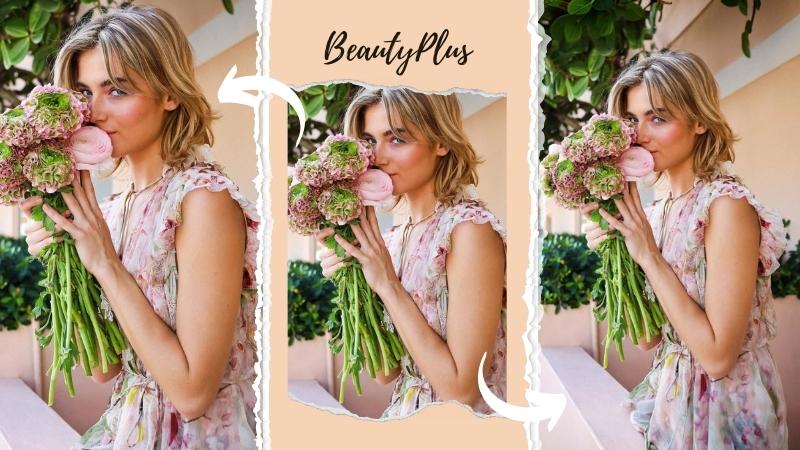
2.How to Make Blurry Pictures Clear on Beautyplus
If you’re on an iPhone or Android phone, you can use the Beautyplus app that is free to use and it can unblur your photos to a very high extent. For this we’ll use the AI enhance feature of Beautyplus that gives us crystal clear and sharpened pictures in just a few seconds.
- First, download the app from Play Store or App store if you’re on an Android device or iPhone, respectively.
- Then open the app and give all the permissions it asks for to access the multimedia on your phone.
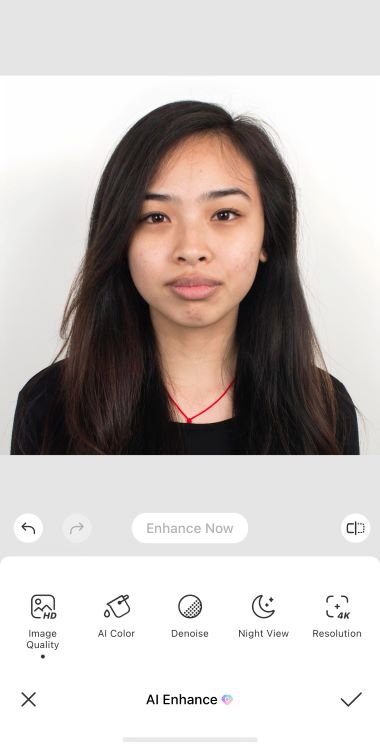
- Now you’ll see a list of tools on your dashboard. Find the AI Enhance tool and tap on it.
- Then tap on the Try Now button at the bottom and you’ll see a list of image thumbnails. Import the photo that you want to unblur.
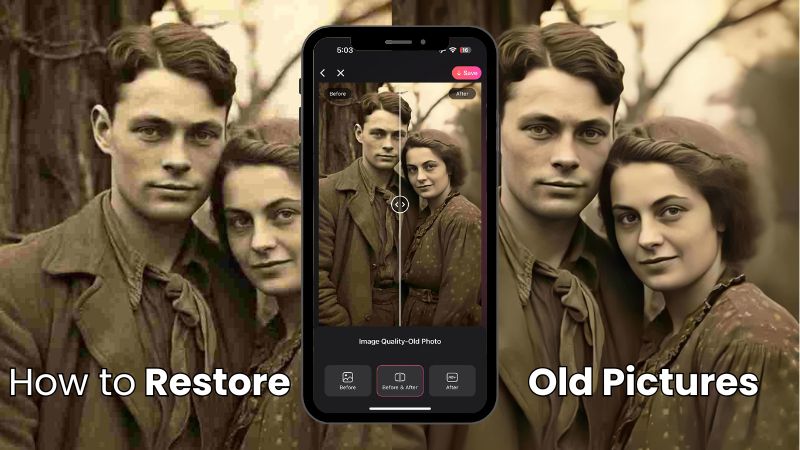
- It’ll do a little bit of processing and once the tool loads, you’ll see a slider in the middle of the photo. Move it to the right and you’ll see a preview of an unblurred photo. Move the slider entirely to the right and tap on the Save button below. That’s it, your photo is unblurred and ready to share.
If you don’t feel like to download an app on your mobile device, you can also use Beautyplus Online AI image enhancer tool which is more quick and easy to use.
3.How to Make Blurry Pictures Clear Photoshop
So if you’re interested in sharpening your blurry images on your PC whether you’re using a Mac or a Windows device, you can do it effortlessly using Photoshop that is a very popular tool currently. Assuming that you’ve installed Photoshop on your PC, open it and load the image that you want to edit.
- Now on the right hand side you’ll see Layers tab and under it you’ll see your photo on Layer 0.
- Below that window at th bottom-right you’ll see tiny icons like + and delete.
- You’ll have to drag and drop your Layer 0 on that + button so that you can replicate that Layer. If you replicated your Layer 0 successfully, you’ll see “Layer 0 Copy” in your Layers tab.
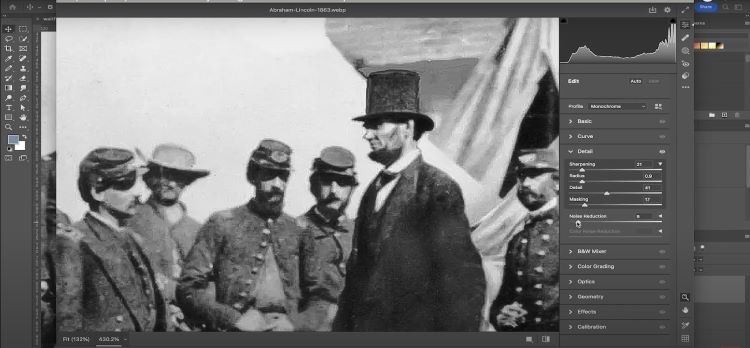
- Click on Layer 0 copy. Then click on the Filter tab on the top of your window. Under the Filter tab select Camera Raw Filter.
- A window will pop up with your image preview and a load of tools on your right. There, you need to select the Detail tab on your right and you’ll see more tools underneath it such as Sharpening, Radius, Detail, and Masking.
- We’ll work on the Sharpening tool and there you’ll see a slider. Simply side that slider and you’ll see a significant reduction in the blurriness of your image. Adjust the slider accordingly and try adjusting other features like Radius, Detail, and Masking.
- Now try the Noise Reduction slider and see if it makes your image any clearer. It’s not necessary that Noise Reduction will compulsorily enhance every image.
- When you’re happy with it, click OK.
- Then delete the Layer 0 because we were working on Layer 0 Copy. Now save your Photoshop project and export the image in any file format as you desire and it’s ready to be shared with everyone.
4.How to Make Blurry Pictures Clear in Canva
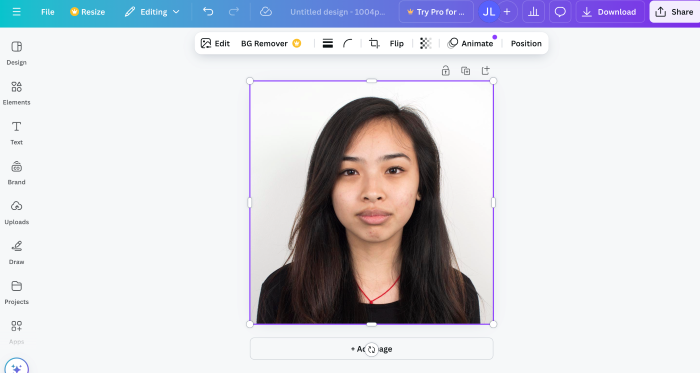
So if you’ve heard of Canva, it’s a popular tool that can fix your blurry images to some extent and it gives you free access for a limited number of projects. It’s a web app so open it on your web browser. We recommend using a PC for this, though.
- Log into your Canva account and then click on Create new design on the top-left of your screen.
- Click Social Media on the left and select Instagram Post Square or any other option in the list as you want.
- Now you’ll get redirected to your workspace and there on the left hand side, you’ll see an Upload option. Click on it and upload your blurred image that we need to work upon.
- Once it gets uploaded successfully, click on that image and it’ll load on your workspace.
- Click on your photo to make sure that it’s selected. Now you’ll see a list of options above the image. Click on the Edit button and this will display loads of tools on your left.
- Now click on the Adjust tab and it’ll expand a lot of more tools. Scroll down and find the Texture section. Under the Texture section, you’ll find Sharpness slider.
- Simply slide the slider and see what results it shows in real time.
- You can also try other sliders like Clarity and Vignette and see if it works on that particular photo. If you made some mistakes, you can click the “Reset Adjustments” but this will undo all the changes you made so far.
- If you’re happy with the adjustments, click on the Share button on the top-right and click the Download button to save that photo on your device. Or else you can try other share options as well.
Beautyplus vs Photoshop vs Canva
| Comparison Basis | Beautyplus | Photoshop | Canva |
| Skills needed | No skills needed | High level of skills needed | Average level of skills needed |
| Time taken to sharpen a photo | Just 2 to 3 minutes | Can take more than 5 minutes | Can take more than 5 minutes |
| Efficiency in sharpening a photo | Highly efficient and effective in sharpening a photo | Efficient & highly effective | Relatively efficient and average effectiveness |
| Free access | Free access on iPhone and Android devices, need to pay if you’re using the online version. | Not free but users can try it for free for 7 days | free access |
| Support for multiple devices | Supports multiple devices | Supports multiple devices | It’s a web app but works properly on desktop devices only |
Conclusion
So what if you’ve got a blurry photo, you have so many options through which you can rectify them. If you’re a girl who’s fond of posting outstanding photos on social media you might be wanting to use the Beautyplus app because not only it’ll unblur your blurry photos, it’ll also give you an immense number of exciting features that’ll further beautify your photos. As far as other options are concerned, they’re either not effective enough or the tools are not free like Canva or Photoshop.