3 Best Ways to Add a Grain Filter to Photos Online
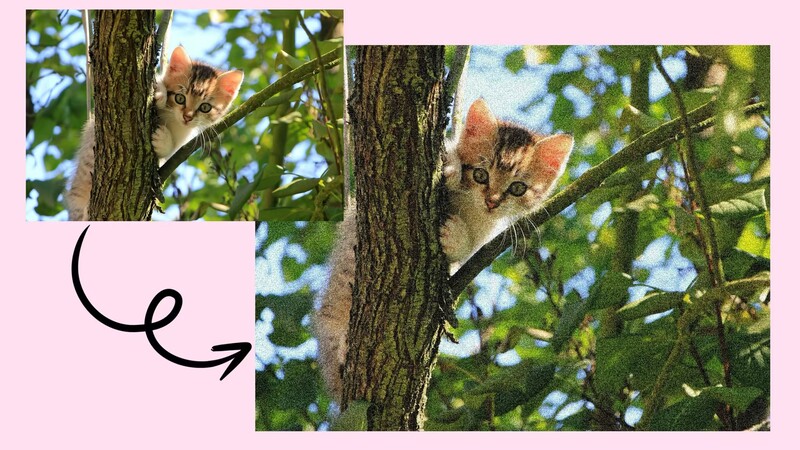
For people who might live in the present but always want to have a strong association with the past, the photos with the grain overlay are of much significance. This is because of the memories such pictures take them back to.
But, it was not easy to procure those cameras that were used in 1960 to capture those pictures. Hence, there are other methods of editing using a grain filter in the pictures.
There are grain filters in the BeautyPlus application and in the Fotor tool. Here in this article, you will find how you could add grain filter to your photos online.
Part 1: How to Add Grain to a Photo with the BeautyPlus App?
BeautyPlus is an online camera app that comes with unlimited options for editing pictures and illustrations. Beautyplus can make your images look stunning by simply applying multiple filters, making a collage, and much more.
Moreover, it assists in erasing numerous imperfections in the image such as fixing closed eyes, a bland backdrop, and so on.
Step By Step Guide to Using BeautyPlus to Add Grainy Photo Filter
If you want to add a grain filter to the image then one of the simplest apps for this purpose is BeautyPlus. Here’s a comprehensive guide for you!
Step 1 – Open the Beauty Plus App

The first step is to go to the BeautyPlus dashboard form the app. If you do not have the app, you can install it from the Play Store or App Store.
Step 2 – Choose the Desired Photo
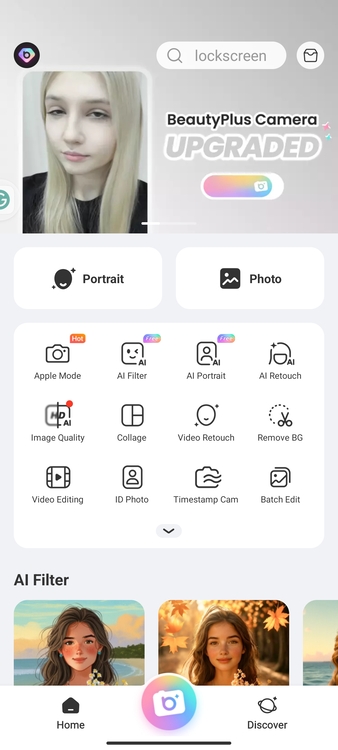
In the middle of the screen, there is a “photo” sign. It provides the option to upload the picture to be edited. So,
- Click on the picture sign
- Open the folder with the desired image as you are directed to the new window
- Select the image to be edited
Step 3 – Go to the Editing Menu
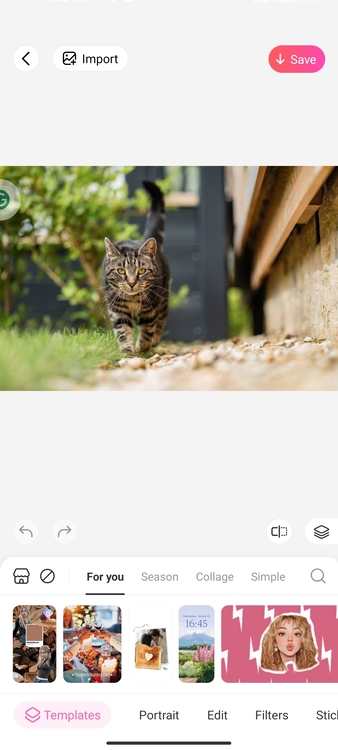
To the right side of the “portrait” at the bottom of the screen, there is an “Edit” option. Select this option to add grains to your picture.
Step 4 – Adjust the Grain Filter in the Image
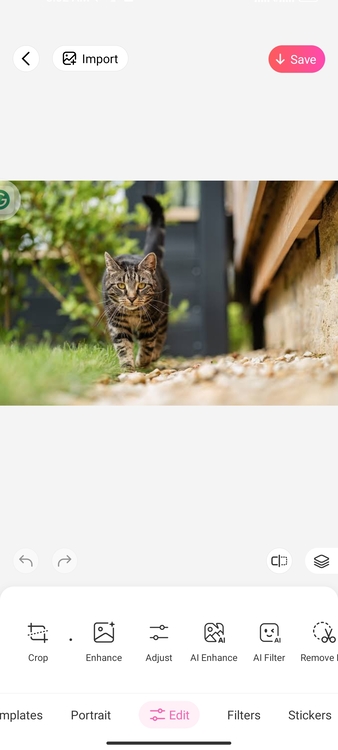
In the edit option, there is an “Adjust” menu, which helps to adjust the color, contrast, brightness, and texture of the image. Here,
- Scroll towards the left side till you reach the end
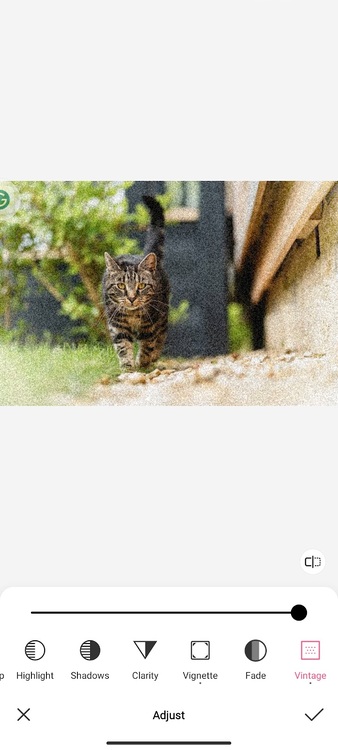
- A “Vintage” option is provided there
- Select this option and move the cursor to the right to add granular texture to the picture
Step 5 – Click Apply and Save it
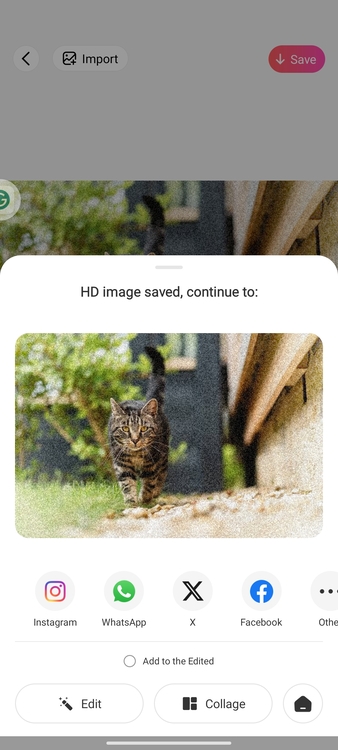
You can add mild grains in the picture or move the cursor to the maximum. Once you are done, hit on the “☑️” sign. Then, choose the “Save” button available on the top right of the screen to download the image with the grain filter.
Part 2: How to Add Grain to a Photo with the VSCO App?
VSCO is software available both as a mobile application and an online tool
Step By Step Guide to Using VSCO to Add Grainy Effect to Photo
While VSCO is available on both mobile and desktop, we will only discuss how to use it on mobile phones. So, below are the steps to use it for adding grain texture to photos.
Step 1 – Open the Vsco App

In the first place, a VSCO application installed on a phone is required. Download the app and launch it on your phone. You get to start with a trial period for free.
However, you will notice that the image in the top right corner cannot be downloaded without a paid subscription. So you must buy it first.
Step 2 – Upload the Picture
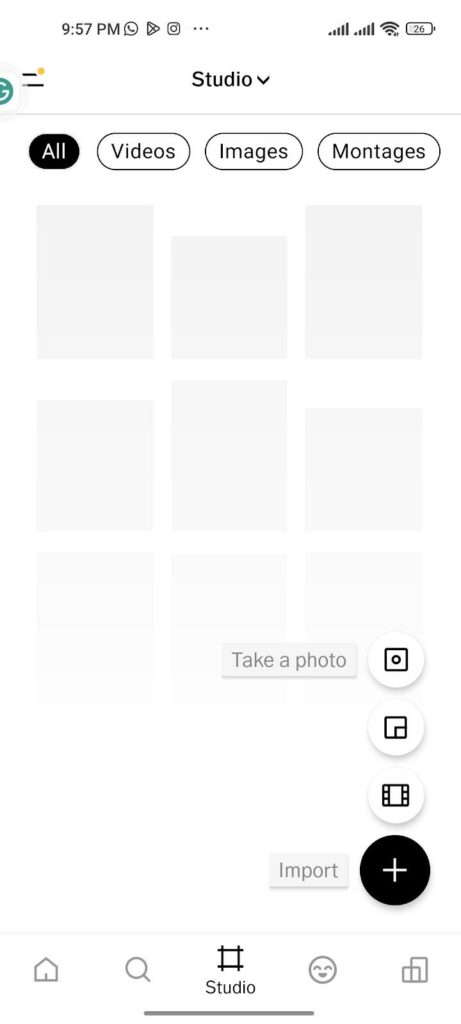
A plus sign is given at the bottom right of the page. You can use it to upload the image. After you upload the image, you should simply double-click on it to move on to the next step.
Step 3 – Go to the Editing Options
Again, in the bottom right of the screen, just right next to the cross sign, click on the adjustment symbol which represents editing options.
Step 4 – Select the Tools
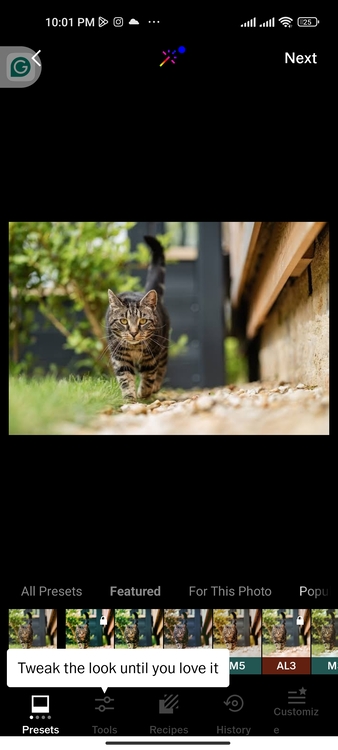
Select the tools option here. On the right side of the “presets”, there is a list of the tools with the grain filters
Step 5 – Find Grain Filter
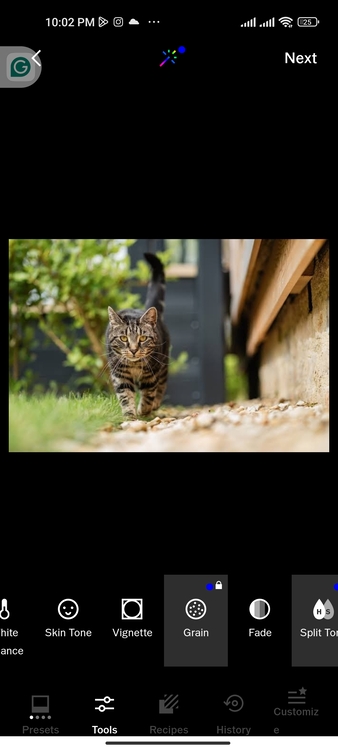
The next step is to look for the grain filter effect. For this, drag the tools options to the left of the screen until you locate the grain filter.
Step 6 – Apply Grain Filter
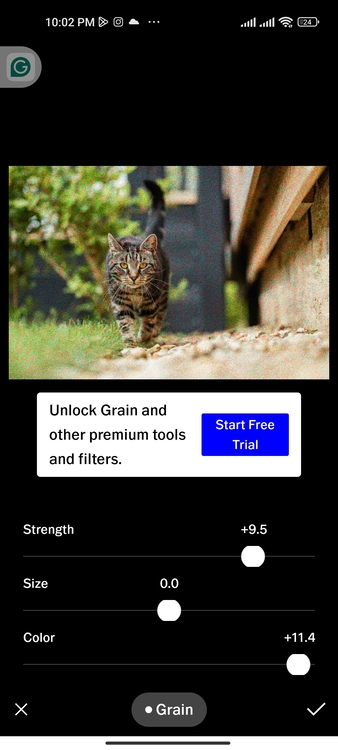
In the grain filter, there are options to adjust the size, color, and strength. Select the settings that appear good on the picture by moving the cursor to the right or left.
Step 7 – Save the Image
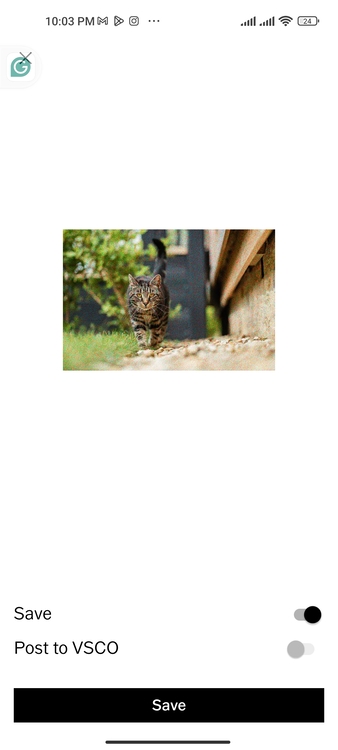
Once you are satisfied with the image, it is time to save it. For this,
- Click on the “download” option on the top right of the screen
- Choose if you only want to save it or save and post it in your VSCO gallery
- Finally, save the picture with a grain overlay
Part 3: How to Add Grain to a Photo with Fotor?
Below is a 5-step instruction guide to using Fotor with images.
Step 1 – Go to the Fotor Grain Texture Tool

As mentioned above Fotor is an online photo editing tool, and you have to use your desktop to access it. For this,
- Search “Fotor Grain Filter Tool” on your browser and click on the first link you see
- Once the link opens, select “Add Film Grain Now”, and it will direct you to the photo editing window
Step 2 – Upload the Image
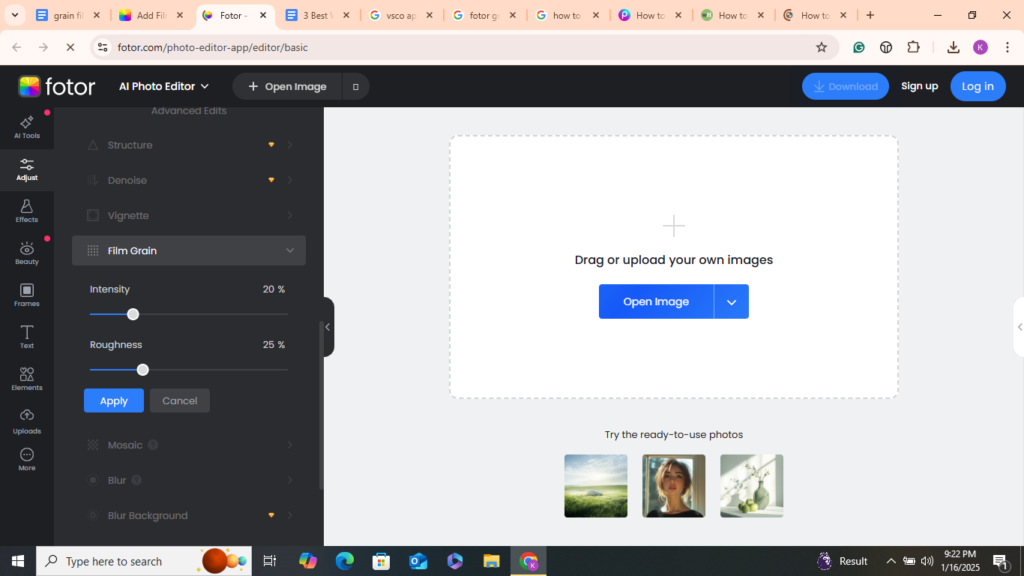
In the new window, there is an option to “Open Image”. Here,
- Click on that open
- Your PC’s gallery will open up
- Find the photo you want to edit here
- Click on “Upload”
Step 3 – Adjust the Parameters of the Image
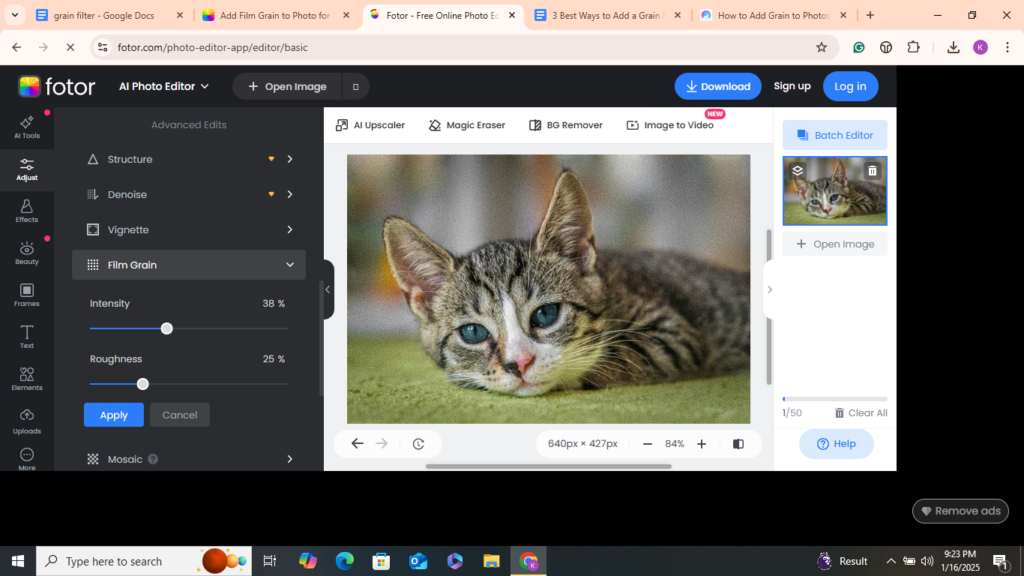
As you have chosen the “grain filter tool”, the options for adding this filter to the image are displayed on the left side of the screen. You can,
- Adjust the intensity of the grains
- Change the roughness of the picture
Step 4 – Apply the Settings

Once you have chosen the final filter, hit the apply button. You can also change size and texture in the final results.
Step 5 – Download the Image
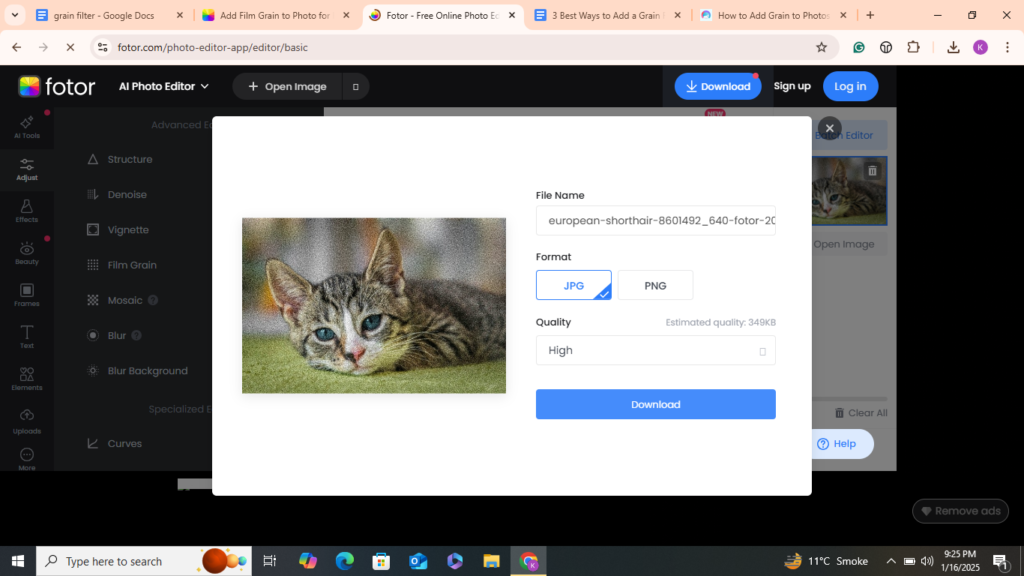
To save the image, click on the Download button. However, you must sign in first to download it.
Conclusion
Grain effects give the images a feeling of antiquity and give the overall impression of a vintage look. None of the cameras can apply a grain filter to the actual image directly and you have to use online tools to add grains to the image.
From this guide, we have learned about 3 tools and techniques to enable you to add grain overlay in the shortest time possible to your photos. BeautyPlus is a photography tool that has special retro grains, VSCO – an application that has the grain function, and FOTOR – a web application that has a grain filter.


