How Can I Fix Lighting in Photo: 3 Easy Ways
When you are taking a picture on your phone, you mostly have control over the brightness of the picture you are about to take to some extent. But say in situations where the sun is extremely bright and you can’t tell if the brightness is alright, you resort to clicking the picture and when you see it later on the brightness is very off. There are many such situations where you shoot in the dark and end up with a poorly lit picture. The great thing about it is that you can fix lighting in photos to your liking and never have to worry about bad lighting ever again.
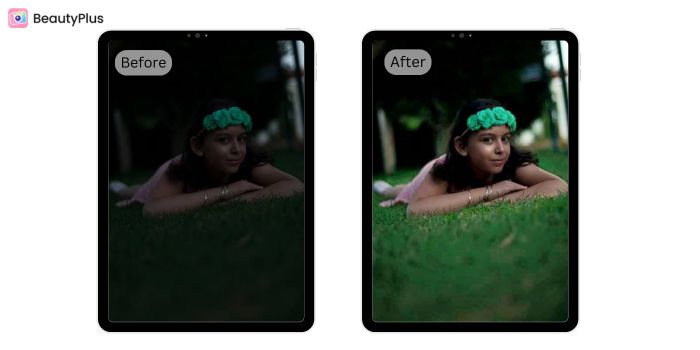
How to Fix Lighting in Photo with Beautyplus
BeautyPlus is one of the first photo editors that focused its services on beautifying images so you can post your selfies and photos in complete confidence. Not only does BeautyPlus allow you to fix the major issues in your picture like fixing a stain or opening your eyes when you close them while the photo was being taken, but it can also help you make a few minor edits to the photo too such as tuning up the brightness a little.
You have the power to control the lighting of your photos, you can either brighten photos by adding a touch of studio lighting or tone down the 3D lighting to add focus to your prime subject. To get started, here’s how to brighten photos in BeautyPlus.
1. Open the BeautyPlus app on your device and if you don’t already have it installed yet, quickly download it to your device.
2. At the homepage, tap on the “Start Editing” button so you can import your photo to the edit screen.

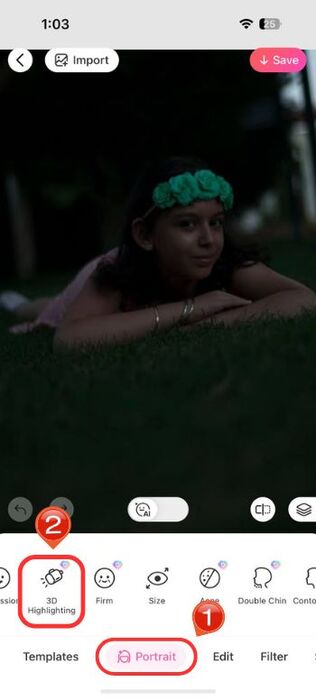
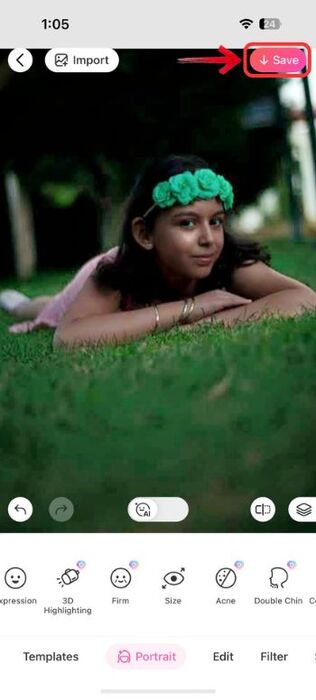
3. Once you are on the edit screen, go to portrait mode by tapping on “Portrait” on the edit tab.
4. Now scroll a little through the portrait options and tap on “3D highlights”.
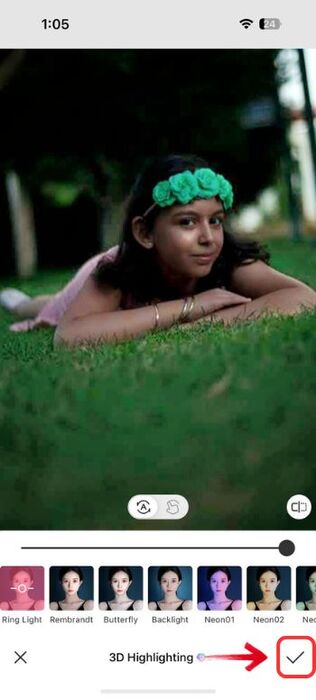
5. You will have plenty of lighting options to choose from, tap the one that you want to apply to your photo and adjust the intensity by changing the intensity scale.
6. Once you are satisfied with how the image looks, tap on the “tick” icon at the bottom right to save the image.
7. Now to save the image to your device so it becomes shareable, tap the “Save” button on the top right of the screen.
How to Fix Lighting in Photo on iPhone
If you have an iPhone, your photo editing is basically sorted. You normally wouldn’t find the need to get a third-party application to help you edit your photos because your iPhone is equipped with all the editing features. And on occasions where you need to perform minor edits such as fixing the lighting a bit in your photo, you can conveniently perform those edits on your phone. This editing feature is available across all iPhones, so no matter which tool you are using, you can fix the lighting of your photos in a snap. Here’s how to make pictures brighter on iPhone without relying on a third-party tool:
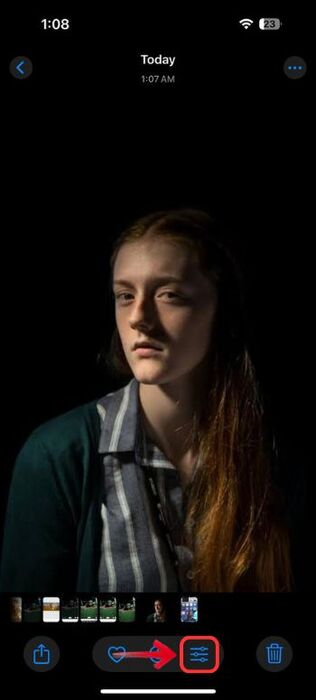
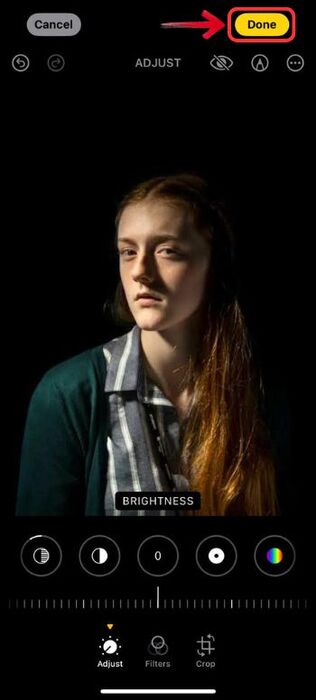
1. Open your iPhone and go to your gallery by tapping on the “Photos” app.
2. Head over to the “Edit” icon, which should be located at the top right of your phone, if it is updated to iOS 18, you will find its icon at the bottom.
3. Tap the “Adjust” icon and play around with settings like “Exposure”, “Brightness”, “Brilliance”, and “Highlights”, to correct the lighting of your photo.
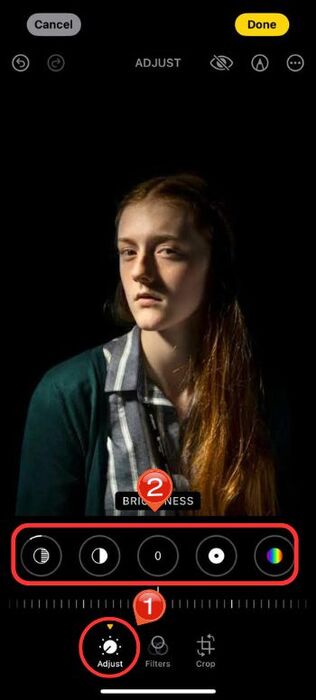
4. Once you are finally satisfied with how the image turned out to be, tap “Done”, at the top right of the screen.
How to Fix Lighting in Photo with Online Tools
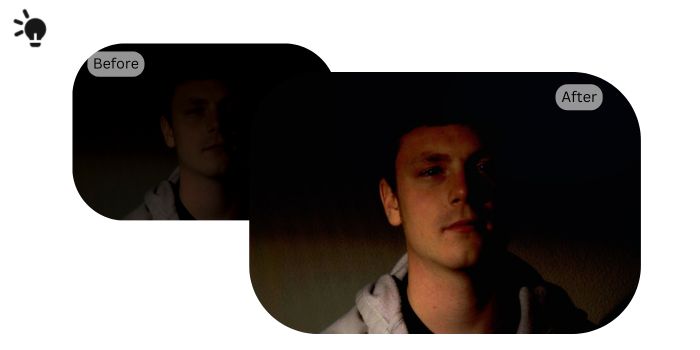
Clipdrop’s Relight tool can help you fix the lighting of your picture online, so if you are not in the mood to use your phone or install an additional app, you can just head over to Clipdrop. It has quite a wide variety of lighting options for you to choose from, which means that there are lighting presets. This way you wouldn’t have to adjust the intensity of the brightness or create your own lighting manually. But if you feel like customizing your way around your image, you have options for that too! So here’s how to make iPhone photos look professional with Clipdrop Relight:
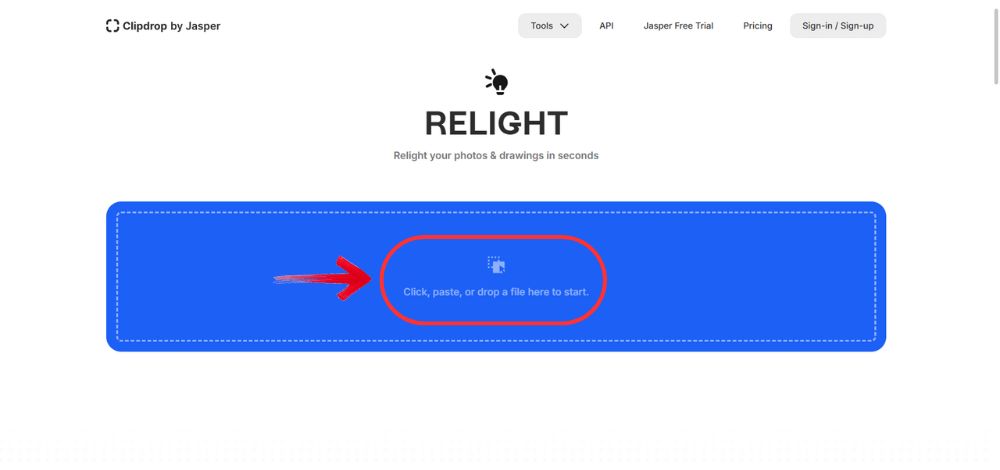
1. Open your favorite browser that you feel most comfortable with and head over to the Clipdrop Relight tool.
2. At the homepage, you will find a button that says “Click, paste, or drop a file”, click that button to import your image.
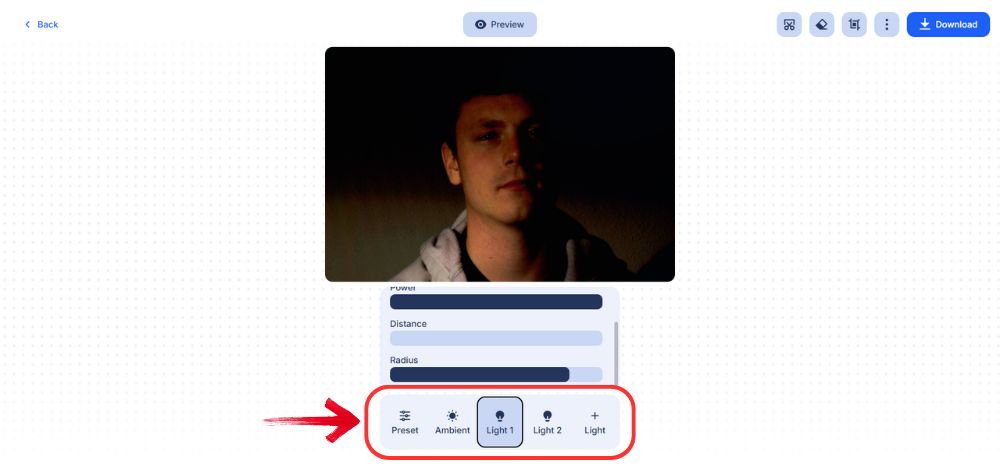
3. The image will open on the edit screen. By default, you will be presented with preset options, which as you click will apply to your image.
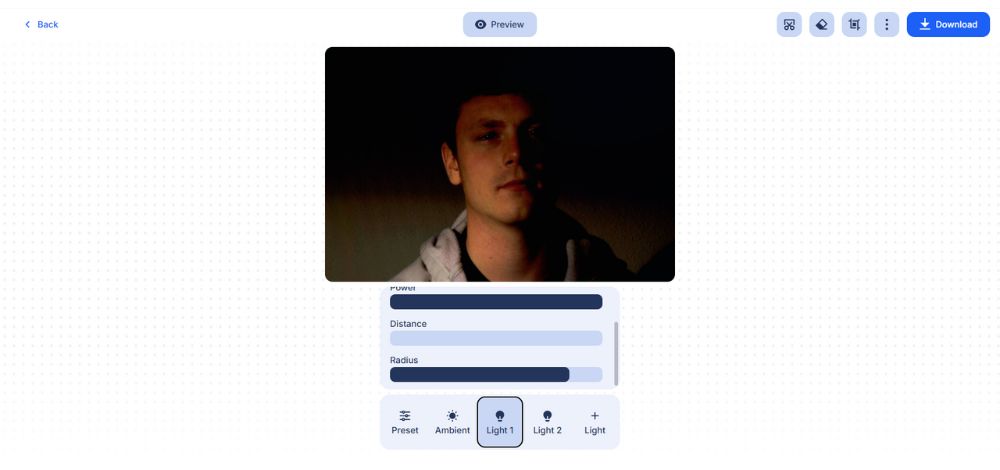
4. You can also choose between the “Ambient”, “Light 1”, and “Light 2” options, at the button right, and play with their intensities until it fits your vision.
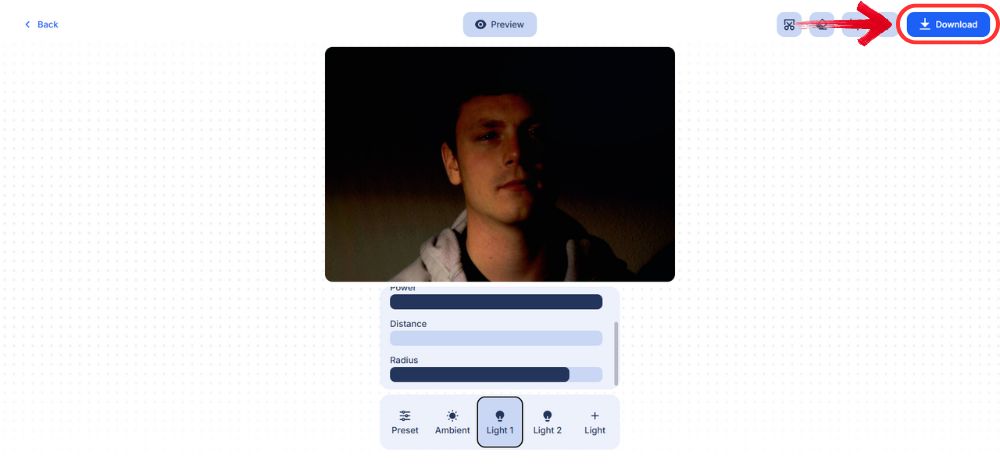
5. Lastly, if you want to save the image to your device, you can simply click “Download” at the top right of the screen.
Bottom Line
Good photography is proportionate with good lighting, in fact, lighting is one of the most important factors to consider when you are taking a photo. But at times, the lighting of our pictures is not in our hands and we can only do so much to control it. From opting for a third-party tool with extensive lighting and highlighting editing options to an inbuilt editing tool on iPhone, you will find a solution to all your concerns today.