How to Take a Passport Photo With an iPhone? (2 Methods)

Who would have assumed that technology would get so advanced that we wouldn’t have to run to a studio and pay 100s of dollars to get passport-sized photographs urgently? The mobile phones and digital applications of the modern day allow their users to take their own passport or ID pictures at home.
So, you can click a decent photo of yourself with your mobile phone as long as you are aware of your country’s requirements for a passport photo. In this article, let us study which type of passport photos are accepted in different regions of the world and how to take a passport photo with an iPhone.
Part 1: Passport Photo Requirements by Country
Passport photo requirements vary from one country to another. So, below are the features of passport photos considered valid in various regions worldwide.
US Passport Photo Requirements
In the USA, your passport photo must have the following features,
- Dimensions: Image with size of 2×2 inches with head located in between 1 to 1.4 inches
- Background Color: Plain white color
- Other Details: Photo must be recent; no eyeglasses, headphones, or other accessories allowed; well-lit background; neutral facial expressions; and no shadows in the picture
India Passport Photo Requirements
The requirements for an Indian passport photo are slightly different than those of the USA and are given as,
- Dimensions: The picture of 2×2 inches
- Background Color: Neutral background which might be white or off-white
- Other Details: Natural facial expressions; no head covers other than for religious reasons; head in the center of the image; and clear resolution
Philippines Passport Photo Requirements
In the Philippines, the types of passport photos accepted are given as,
- Dimensions: 3.5×4.5 cm
- Background Color: Royal or dark blue
- Other Details: Matte paper; The face must cover around 70% of the background; Natural smile with no visible teeth; and a recent photograph
Part 2: How to Take a Passport Photo with an iPhone? (2 Foolproof Ways)
You can click a picture with an iPhone. However, its background, light, and other features need to be edited to make it passport-friendly. Multiple tools are used for this purpose.
Out of all these tools, let us discuss 2 seamless methods to take a passport photo with an iPhone.
Method 1: Using BeautyPlus – ID Photo Feature
The first method is using the BeautyPlus App.
Step-by-Step Guide on Taking Photos with BeautyPlus
Let us learn how to take a passport photo at home with an iPhone using BeautyPlus and choose the best click to display on your visa.
Step 1: Download the BeautyPlus Camera App
There are 2 ways to download BeautyPlus Camera on an iPhone. These are given as,
- Browser BeautyPlus.com and click on the first link you see. In the window that opens, you will see a “get it on Apple store” option. This button will lead you to the installation of the app on your iPhone.
- The second way is to install BeautyPlus from your Apple store directly.
After installing the BeautyPlus app on your mobile phone, permit the use of the camera and microphones and set it up to proceed further.
Step 2: Locate its Photo ID Feature
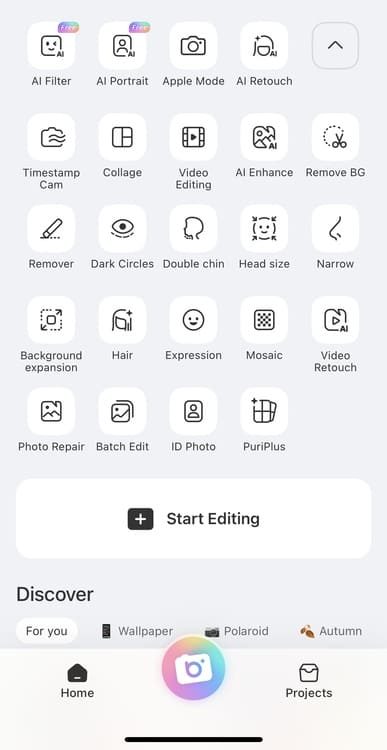
BeautyPlus camera comes with unlimited photo editing features and amazing ai filters. To use it for creating your passport-size photo, you have to search for the option that can accommodate you.
For this,
- Click on the “ID Photo” option in the menu that appears on the screen.
- Also, a tip to localize is finding it in the bottom line.
Step 3: Step into Capturing Your Passport Photo
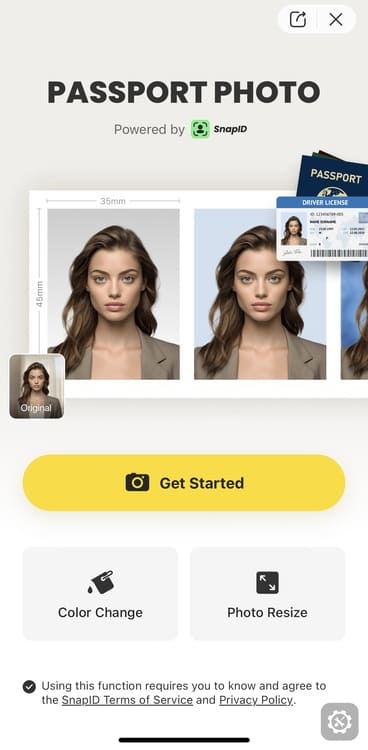
When you click on the option mentioned above, a passport photo window opens. In this window,
- Press on the “Get started” button with a camera sign on it
Step 4: Select the Type of Passport
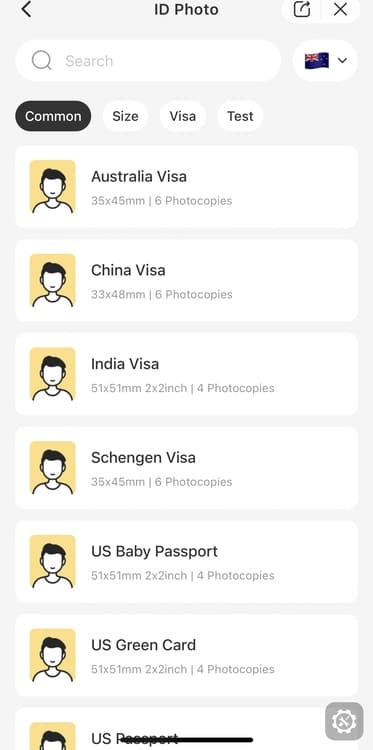
Before taking a picture, you have to select the country of your passport, as BeautyPlus helps you click a picture compatible with the passport requirements of that specific country.
You can do so by,
- Scrolling and selecting your desired visa
Step 5: Capture the Picture
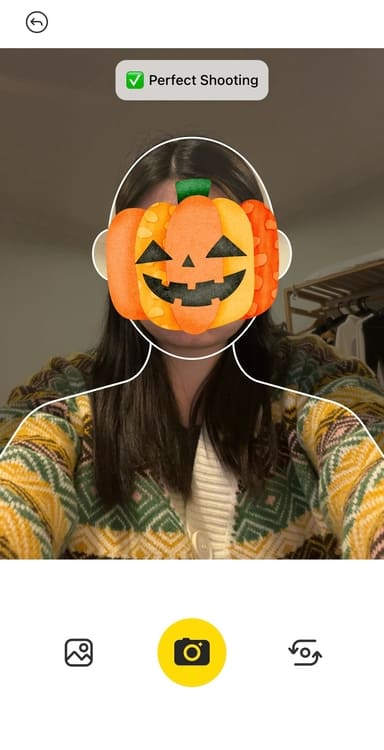
As the camera screen opens, you will see an outline on it. Then,
- Adjust your head and shoulders in that outline
- Touch on the camera icon to click a picture of yourself
- Follow the tips mentioned on the screen as you capture the picture
Step 6: Adjust the Picture Position
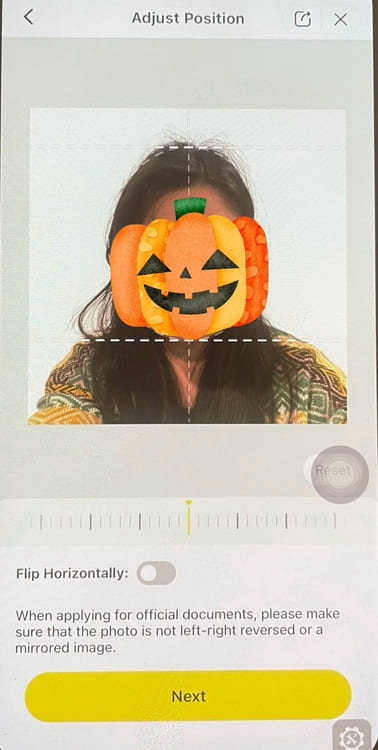
If your head is tilted to one side of the screen, adjust its position by
- moving the indicator you see just below the picture
- Then hit the “next” button.
Step 7: Edit the Picture
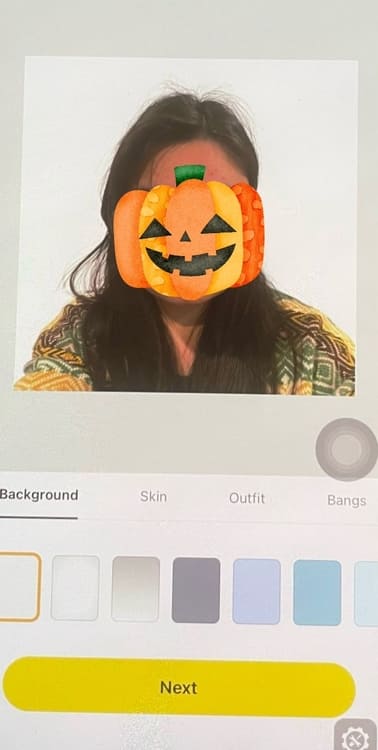
Finally, change the following features of the picture you have clicked,
- Background color
- Hair
- Skin
- Outfit
- Other features
Step 6: Wait for Processing and Save Photo

It takes a few seconds to minutes for the photo to process adequately. So,
- Wait for a while and then finally save the picture on your phone
- Purchase the photo
- Get it printed anytime and in any color you like
Tips for Taking Passport Photos with iPhone Using BeautyPlus
Some tips for taking passport photos in BeautyPlus include,
- Always click the picture in a well-lit background
- Keep your head straight and look into the camera with natural expressions
- Click the picture with the back camera of the iPhone
- Wear light to minimal makeup
- Do not tilt the head
- Do not wear any clothing items or jewelry that hides any facial feature
Method 2: Taking a Passport Photo Manually and Editing with SnapID
Although BeautyPlus directly allows you to click the picture from its camera, there is no such thing with SnapID. Thus, you have to click a picture with an iPhone first and then edit it to make it passport-compatible.
Step 1: Know the Passport Photo Requirements of the Specific Country
In BeautyPlus, manual options are present allowing you to select the right features of a passport photo. Similarly, you have to consider the requirements of different countries while taking passport photos with an iPhone.
We have mentioned most dimensions in this article.
Step 2: Go to a Well-Lit Space with a Neutral Background
The second step is to sit in a well-lit room. For this,
- Turn on all the lights in your room. (They might give you a pale or yellowish complexion)
- Open the window of your room
- Sit by its side. (It shows natural colors)
Step 3: Remove All Accessories Near Your Face
Look into the mirror and remove the following accessories,
- Scarf
- Earrings
- Headcover
- Sunglasses
- Hair accessories
Also, tie your hair back.
Step 4: Set Your iPhone’s Position
You can do so by following these steps,
- Take a tripod stand and set your iPhone in it
- Place a doll in your place to ensure that your face is in the middle of the screen
- Simply ask your friend to click a picture for you
Step 5: Set Your iPhone’s Camera Settings
There should be a distance of around 1-2 meters between your chair and the iPhone. Then,
- Turn on the camera of your phone
- Open its portrait mode
- Choose the “original” filter
- Sit straight in your chair.
Step 6: Go in Front of the Background and Position Yourself Correctly
Here are some tips to sit correctly,
- Keep your head straight
- Make eye contact with the iPhone’s camera
- Do not tilt your head in any directions
- Make your shoulders straight
Step 7: Click the Picture
Here is how you can take a picture on an iPhone
- Set a timer for your iPhone’s camera
- Open the continuous picture-shooting mode of the iPhone
- Smile a little or maintain natural expressions
- Allow the mobile to click your images
- Choose the best shot
Step-by-Step Guide for Optimizing the Photo with SnapID
The iPhone will take a perfect picture of you. But you need an app to turn it into a passport photo. So, follow these steps to use SnapID for making passport pictures.
Step 1: Open SnapID
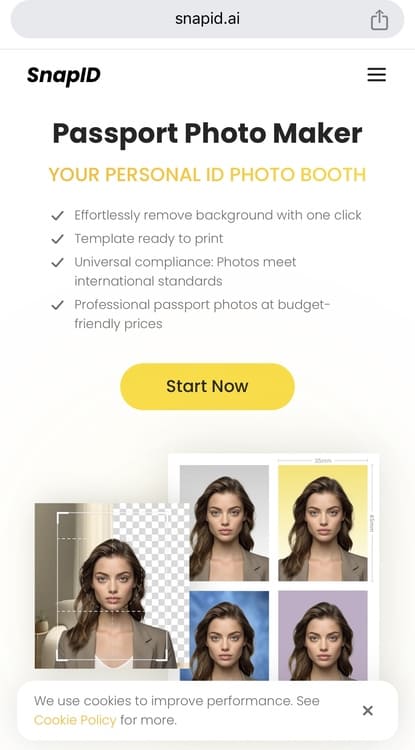
Browser “SnapID” or click on this link to go to the all dedicated as a passport photo maker.
Step 2: Choose the Country
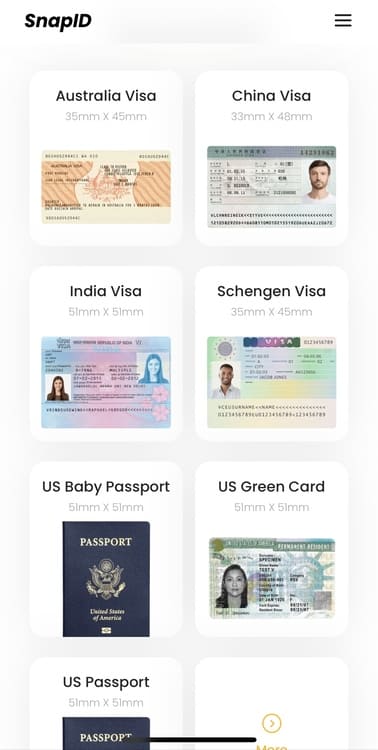
This application has pre-set options for you.
So, simply select the country of your choice in the options given below.
Step 3: Select the Picture

After you choose the country, a window along with that country’s requirements for passport ID will open up. There, you can upload the picture you clicked using an iPhone by clicking on the “upload photo” option provided in the yellow box.
Step 4: Upload the Picture
If you are using SnapID by downloading the app on your iPhone, the upload option will take you to the mobile’s photo gallery.
Step 5: Review the Picture and Continue
As the photo is uploaded on the app, carefully review the picture to see if you are happy with the results. If not, reupload another picture.
Step 6: Go Through Compatibility Check
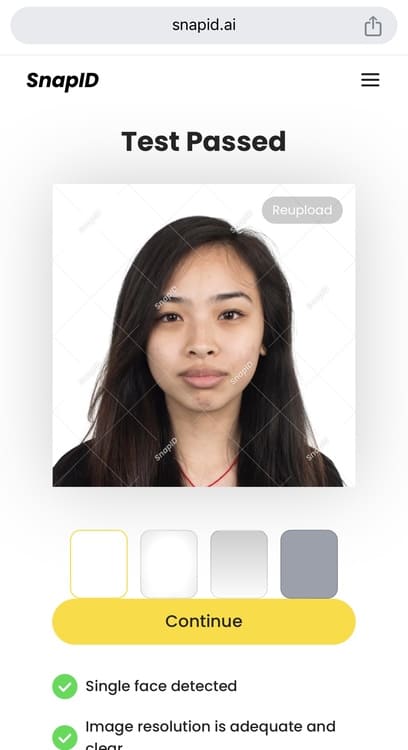
SnapID automatically checks the compatibility of the picture with the country’s requirements. If your picture is compatible, you can save it.
In the other case, upload another picture with better compatibility.
Step 7: Save the Photo
Once your image passes the compatibility check, you can save it on your phone with a single click.
Conclusion
An iPhone with high resolution and a picture editing app with impeccable features are all you need to capture your passport photo by yourself at home. SnapID and BeautyPlus bring the options for creating passport IDs for their condition.
In snapID, you convert a suitable picture into an ID image. However, you cannot only take the passport ID photo but also edit it to perfection in BeautyPlus.