How to Blur Faces on iPhone: Easy Photo Editing Tips
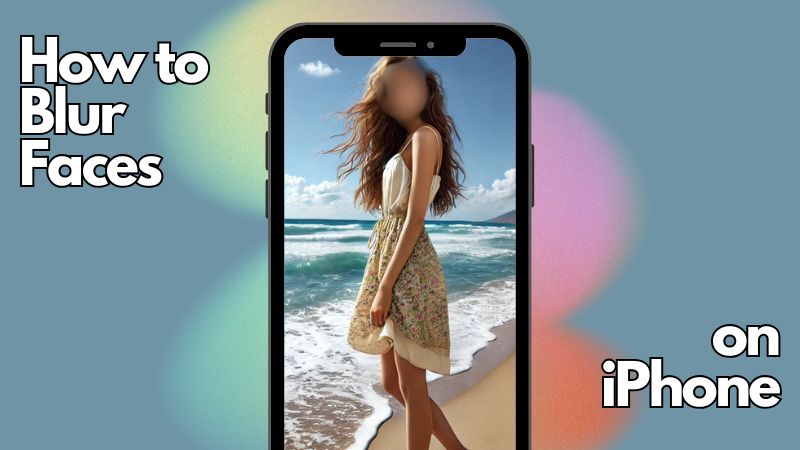
It feels amazing sharing the good times, funny times, comforting times, and even some off times to your social media. And if you feel somewhat disturbed by the idea of having a digital presence, yet wanting to share your life on social media, it is perfectly normal. The best resort for you to turn to would be to switch to faceless.
You can do everything on your social media account that an average person does but with your face blurred. If you have tried out a couple of ways and met with nothing short of disappointment, you can stop worrying about it because today you will learn How to Blur Faces on iPhone the easy way.
How to Blur Faces in Photos on iPhone
iPhones are possibly the best, affordable and handy devices when you want to take that perfect picture, because the picture quality in even some of the older models is simply *chef’s kiss*. But iPhones turn out to be even handier when you perform all the editing that needs to be done within the photo’s app.
Say for instance you want to learn how to blur faces in photos on an iPhone, all you have to do is follow steps below and by the end of it you will have achieved a faceless photo of yourself or anyone else.
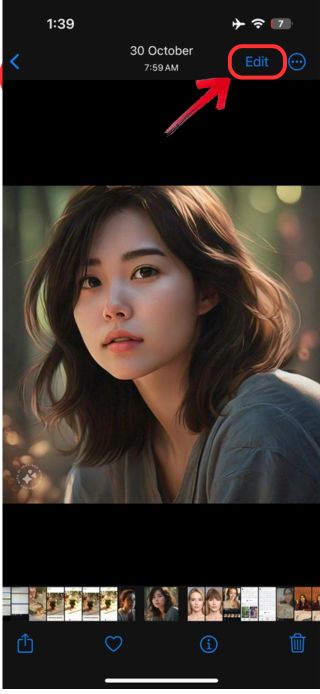
1. Blurring faces on your iPhone is just like editing any other photo; you need to open the image on your Photos App, and then tap on the “Edit” button at the top right.
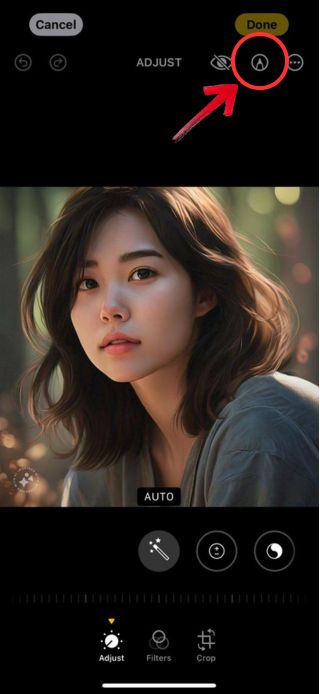
2. Once you’re in the editing tools, you need to gain access to markup tools provided by Apple, for this tap on the “Pen” icon.
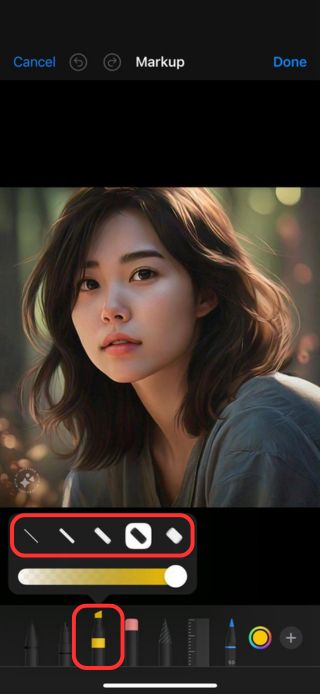
3. The trick with blurring images on iPhone is, you use the “Marker” tool to hide your face. To do this, tap on the “Marker” to select it, and make sure to select the thickness of the marker by tapping it on it again.
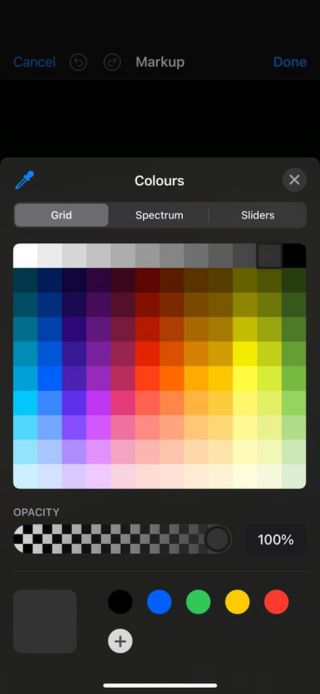
4. Another handy feature is selecting a colour, along with the opacity of the marker tool to make sure you don’t ruin the picture aesthetic.
5. Now simply draw some strokes over the face to hide the face. Once done, you can tap on the “Done” button to exit and save the changes.
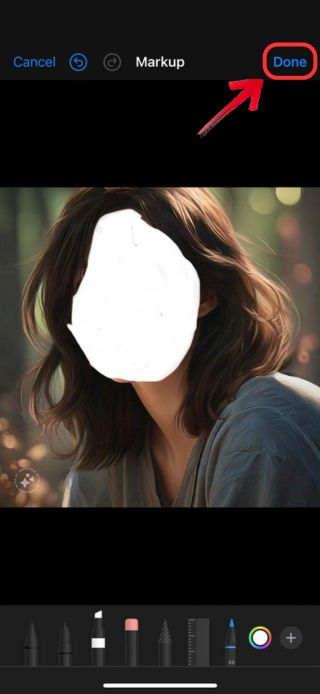
The built-in editing tools to blur faces on iPhone are not really that effective. For starters, it does not actually blur faces, instead allows you to cover it with a marker tool helping you conceal the identity. And since you are here to learn how to blur faces on iPhone, we took the time to research the best practices and found just the app for you, so read along to find out!
How to Blur Faces in Photos on iPhone with BeautyPlus
iPhone has all the basic editing features to suffice for. But sometimes you need a little something extra. And that is why third party tools exist. BeautyPlus is an app that can be installed on both iOS and Android, and is incredibly rich in its photo editing features.
It is hard to believe, especially after learning the fact that this tool is entirely free. So when you want to blur out the face in your photo but iPhone’s photo’s app is just not doing the trick, you can switch to BeautyPlus. It will perfectly align with the aesthetic you are trying to achieve.
BeautyPlus has the right tools that can assist you with concealing your face. Tools like adding stickers, and text, or using the Mosaic effect to blur your face.
And there’s nothing to worry about even if you have never used a photo editing app before, we are here with a guide to help you get started. The first course of action is to download the BeautyPlus app on your iPhone to follow this step-by-step guide on how to blur faces in photos on your iPhone.
1. Let’s quickly open the BeautyPlus app on our iPhone and click on the “Start Editing” button to get started with editing images on BeautyPlus.
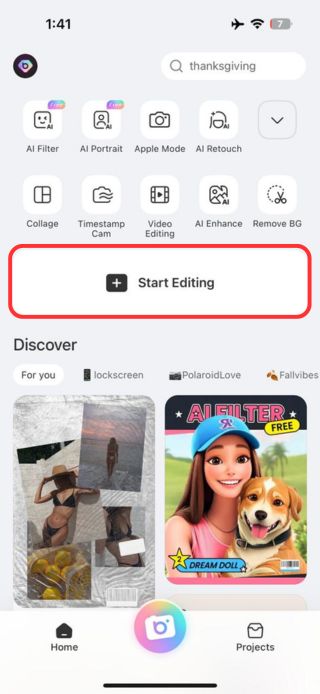
2. You will now be taken to your phone’s gallery, where you can scroll and select the image.
With these initial steps completed, we can now move forward to explore the different tools available on BeautyPlus that can be helpful for you to hide or blur your face in photos.
- Add Stickers to Face
Let’s start with the most common feature; adding stickers to cover your face. You must have seen images on social media, which usually have smilies covering their face. With BeautyPlus, you not only get the basic smilies, but a variety of stickers to do this task.
1. Tap on the “Stickers” tab to get into the stickers section on BeautyPlus. Here you will have a library of stickers; from unicorns to holiday-themed stickers.
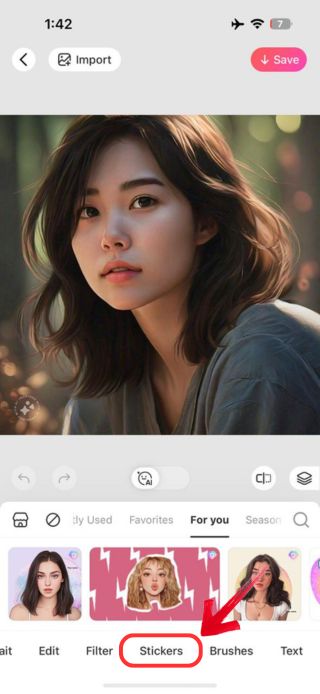
2. Scroll and find the sticker you find the most appealing. Remember the task at hand is to place the sticker on the face to hide it from others while maintaining the picture’s aesthetics.
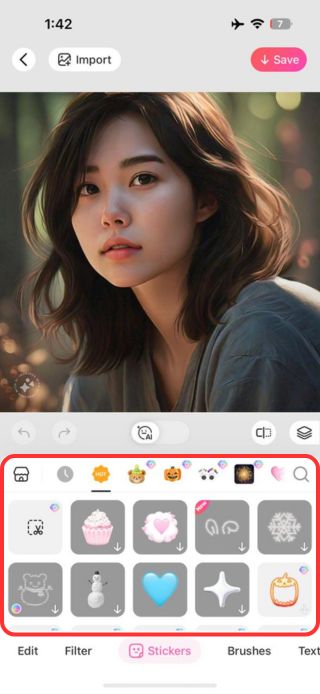
3. Found the right sticker? Tap on it to select it and then adjust the sticker on your face. You will have all the tools conveniently placed at the border of the sticker to help you rotate, increase/decrease the size, remove, or duplicate the sticker.
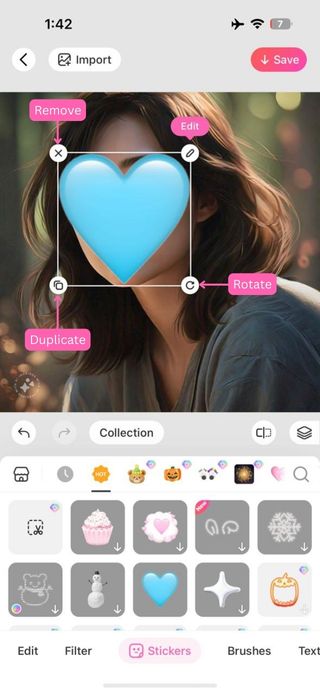
4. With the sticker placed, tap on the “Save” button.
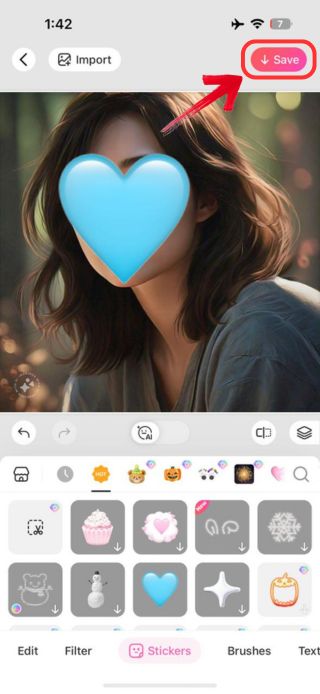
BeautyPlus regularly updates its stickers, bringing in new stickers. For example, recently Halloween-themed stickers were made available for users, and since stickers have a wide range of applications, a fresh batch of stickers are always available to add a fun, seasonal touch to your photos.
- Use Brushes on the Face
Similar to the marker feature in the iPhone Photos app, you can draw some strokes over the face in photos on the BeautyPlus app, all thanks to the Brush tool. But, unlike the usual colours, BeautyPlus has some cool brushes in store.
1. Brushes are another editing tool, simply scroll the menu at the bottom of the screen and tap on the “Brush” tab.
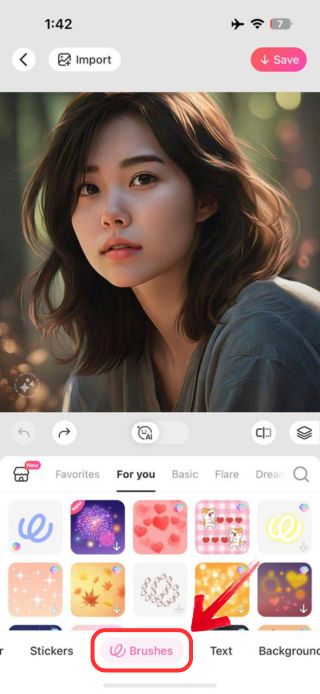
2. See the difference? The brushes available are not conventional coloured brushes, instead you get a range of different brushes divided into categories such as Basic, Flare, and more.
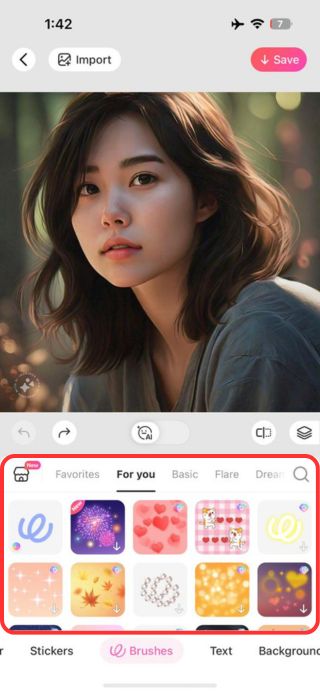
Note: You can add the brushes you like to your favourites for easier access the next time you want to use them.
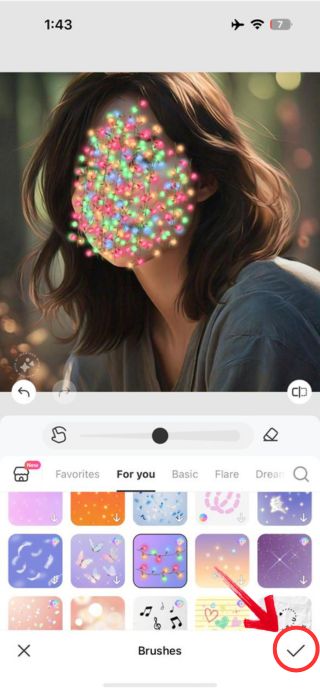
3. Scroll through the brushes, and tap on the one you like the most, and then use it to add brush strokes over the face.
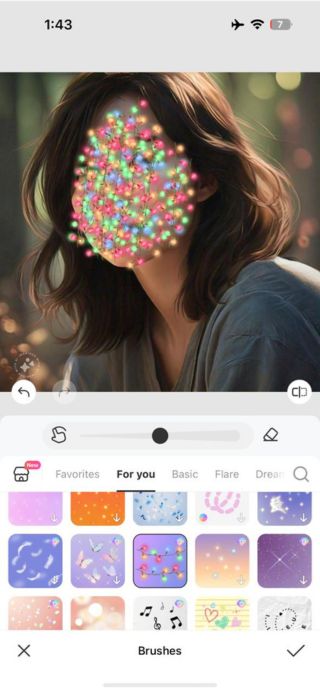
4. Once you have covered the face with one of the fancy brushes, tap on the “Tick” icon to exit and then hit “Save”.
- Add Text to Face
Another option that BeautyPlus presents you with is to add text to obscure your face without fully covering it, making it a quick and visually interesting way to maintain privacy, so it feels less like censorship and more like a creative expression.
1. Within the editing screen, this time we will be heading over to the “Text” tab.
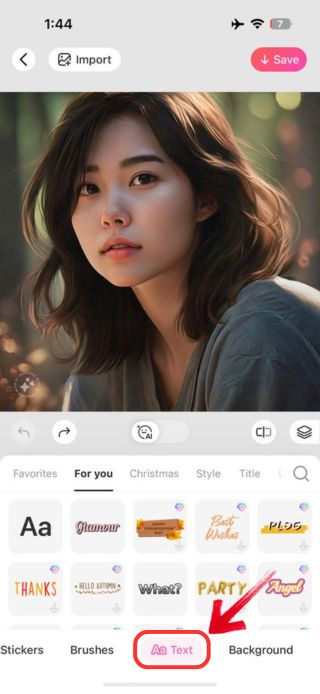
2. BeautyPlus provides you with the options, as we saw in the previous two features, and adding text is no different. You get plenty of options to choose from varying in font styles, colours, and more.
3. Decide on which style would suit the best, and don’t worry about the text written as you get the option to edit.
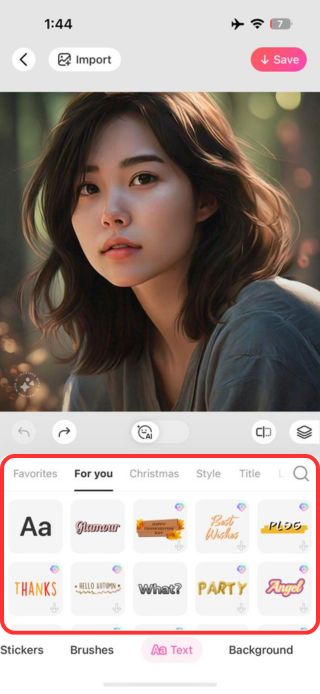
4. Once you select the text, you will have it placed on the photo, use your finger to adjust the text by means of moving, rotating, and adjusting the size of the text box.
5. Don’t like the text, font style, or the layers? You can change them all, simply tap on the “Pencil” icon.
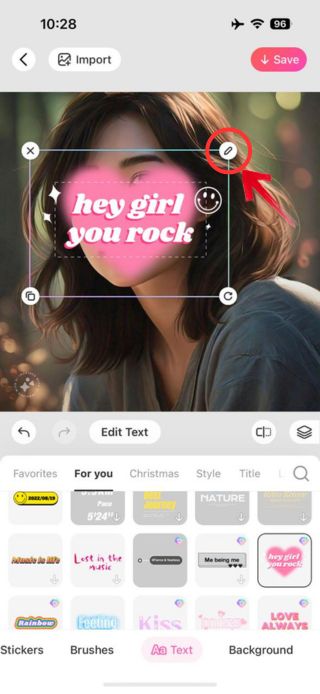
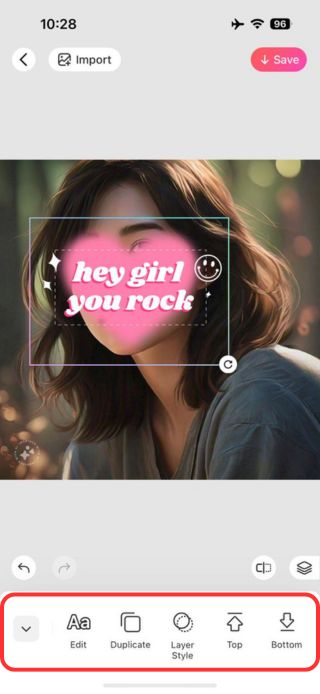
6. You now have the freedom to personalise the Text accordingly and explore the various personalization options available at the bottom of the screen.
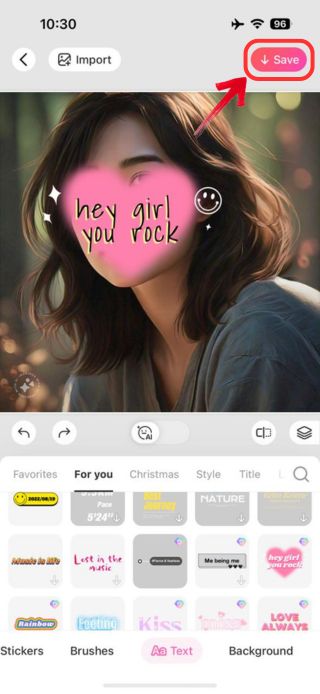
7. Only when you’re satisfied with the results, tap on the “Save” button to save a copy of your edited image.
- Mosaic Face
We saved the best for last—BeautyPlus’s Mosaic tool! Instead of talking about it, let’s just see it in action:
1. To use the Mosaic tool, you will need to tap on the “Edit” tab and then select the “Mosaic” tool.
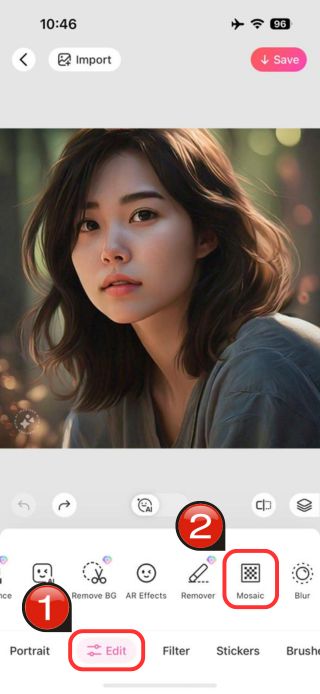
2. Once on the Mosaic tool screen, select the mosaic effect you like from “Classic” effects to simply using the “Solid Colors”, the choice is yours.
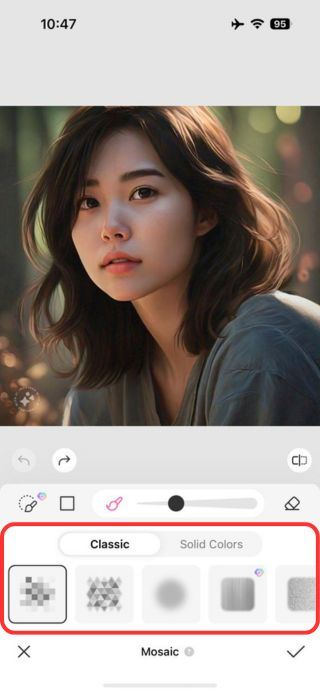
3. Have the effect selected? Use your fingers to brush your face, and see how a pixelated effect is created, masking your identity.
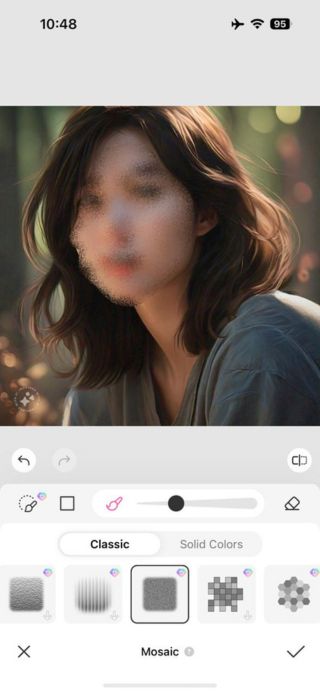
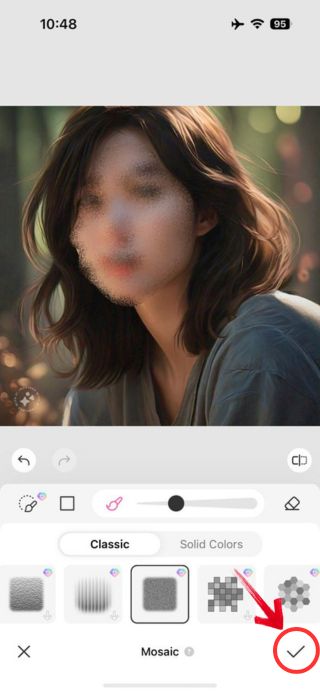
4. And when you’re done, tap on the “Save” button to have the image saved in your gallery.
Bottomline
It may be for the best to not put up some face online, safe from the digital world, which is also home to so many extreme dangers that one can only think of. BeautyPlus is overall a great tool to help you hide your face, either with a blur tool or a sticker. And it is an all in one tool, so you may eventually make use of it for future photo editings. All in all a great tool to have both as backup and your trusty photo editor.


